Who can complete this task?
- Administrators and Site Staff with the Financial Management Extended Permission
While billable items track revenue coming in from sponsors, payable items are the inverse and track money going out (to third parties).
- When a study visit is marked as completed in SiteVault, the system checks the active Expense Plan for any associated expenses; if any are marked as payable, a payable item is automatically generated.
- One-time costs or expenses not tied to a specific visit, can still be tracked by manually creating items using the + Create Payable Item button.
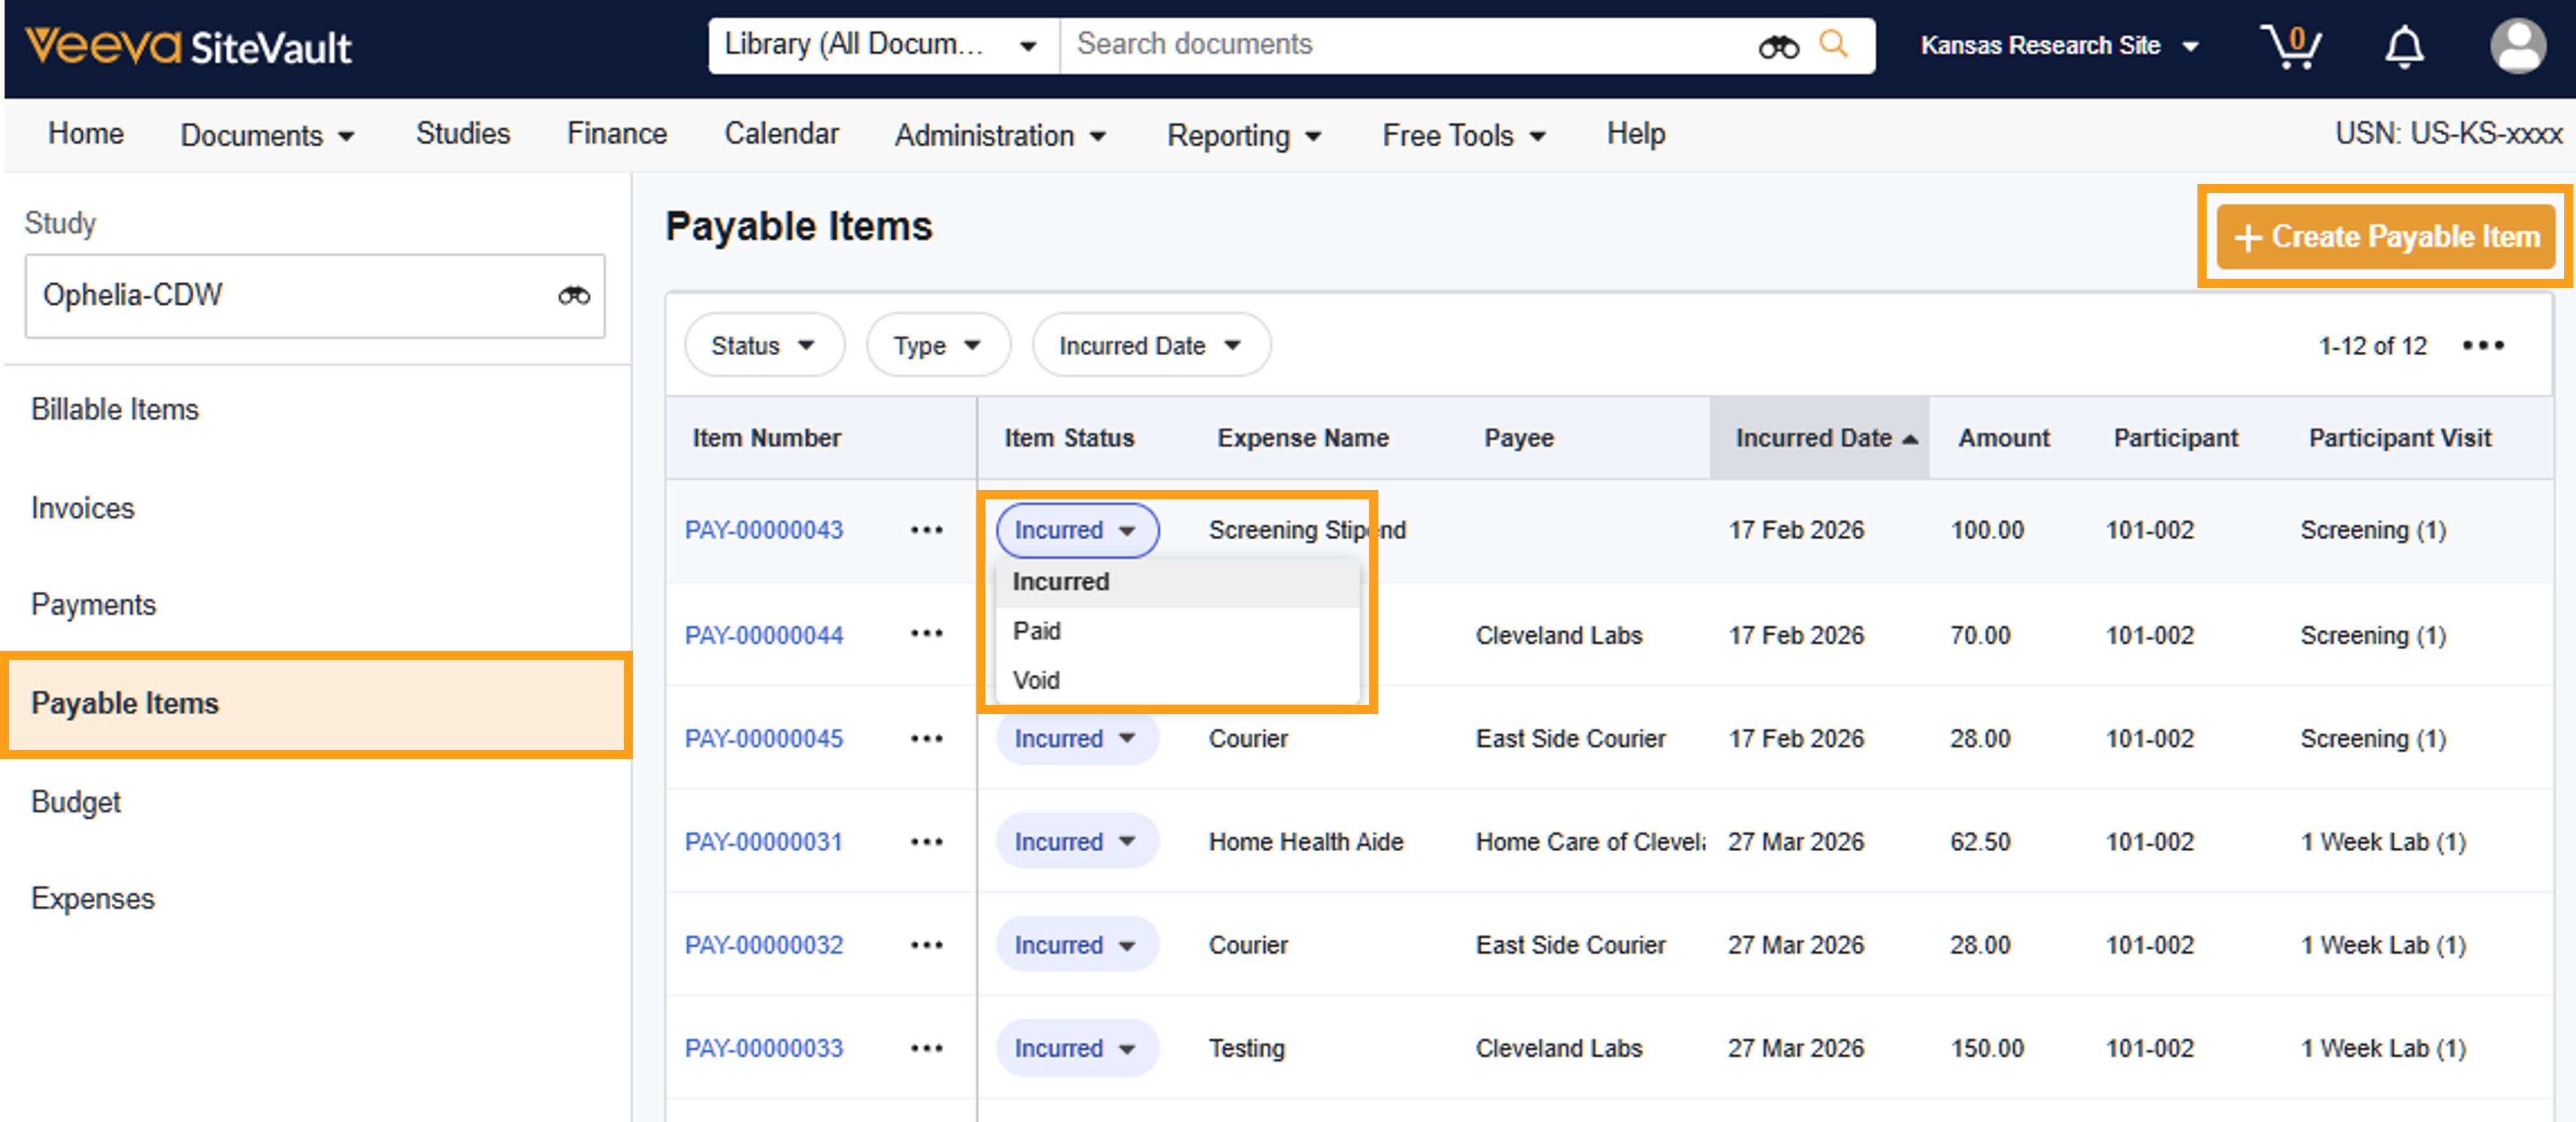
Tracking and Processing Payable Items
To resolve payable items, complete the following steps:
- Access Finance.
- Select a study.
- Select Payable Items.
- Review incurred payable items to verify that the service was performed and the amount is correct.
- Mark as Paid once the payment process has been initiated or payment was sent to the payee. Your site can determine the exact timing for this action.
- Mark as Void if an item was generated in error (ex. if a lab test was cancelled or a participant was ineligible for a stipend due to a canceled visit). This removes the item from your active payable items without deleting the record, maintaining a clear audit trail.
Edit Payable Items
To change item details (ex. Update Payee due to last-minute staff schedule change), complete the following steps:
- Access Finance.
- Select a study.
- Select Payable Items.
- Select the item to edit.
- Select Edit from the Actions menu (…).
- Make necessary changes.
- Select Save.
Create an Ad Hoc Payable Item
You can create an ad hoc payable item for expenses that are outside the scope of the Expense Plan.
- Access Finance.
- Select a study.
- Select Payable Items.
- Select + Create Payable Item.
- Complete the required and any optional fields.
- Select Save.