- Administrators and Site Staff with the Financial Management Extended Permission
Overview
Invoices are created from selected billable items to assist with tracking billing progress and requesting payment from the sponsor. SiteVault automatically generates a formatted invoice document that summarizes billable items, participant details, and billing addresses. You can also export invoice data (.csv) to support external financial systems.
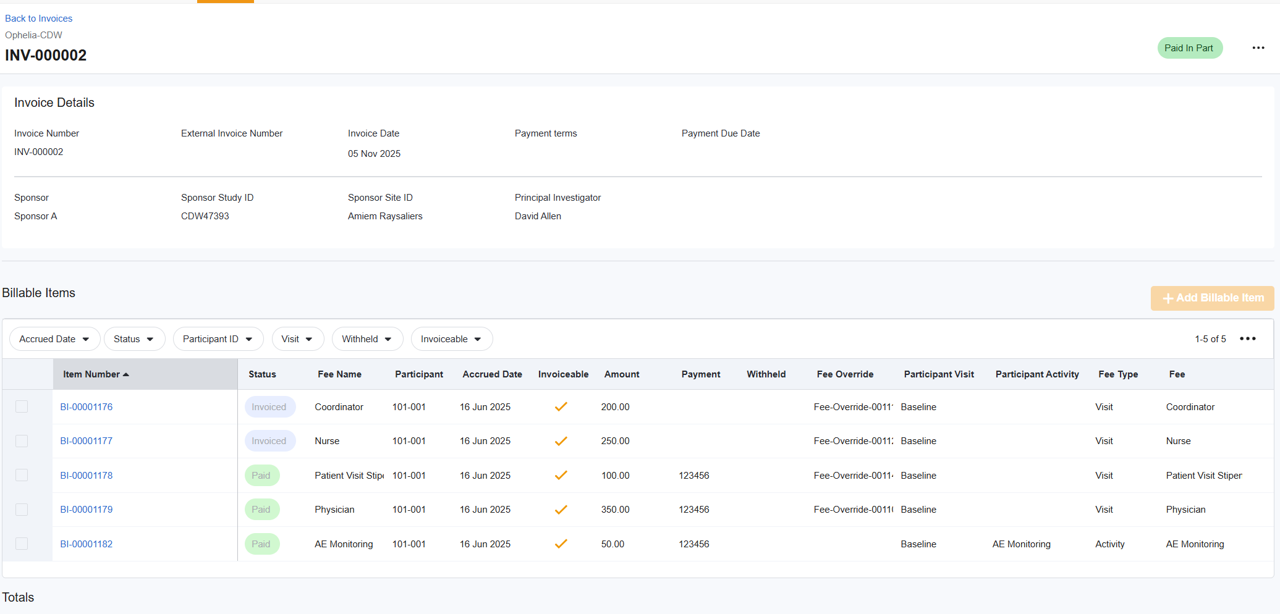
Invoice Grouping and Detail
While SiteVault provides itemized billable items, sponsors often require invoices to be grouped (ex., by patient, by visit, or as a summary). You can use the generated invoice document or utilize the CSV export feature to manipulate the data to meet sponsor-specific invoicing requirements.
Create an Invoice
To create an invoice, complete the steps below:
1. Start a New Invoice
Access Finance > Budgets & Billing > Select Study and use one of the following methods to start a new invoice:
- Billable Items: Select one or more billable items to include, then select Create Invoice from the bulk menu at the bottom of the screen.
- Invoices: Select + Create Invoice, then select + Add Billable Item. Select one or more billable items to include in the invoice and select Save.
2. Review and Edit Addresses
Addresses are optional. Without an address, the space on the invoice will be left blank.
- From Address: Select the From section Edit icon. Select an existing or create a new address. Select Save.
- Bill To Address: Select the Bill To section Edit icon. Select an existing or create a new address. Select Save.
-
Using Addresses:
- SiteVault automatically checks new addresses for duplicates and saves them for future use.
- From addresses are restricted to addresses associated with your site. Bill To addresses must be associated with the study sponsor or an associated study organization.
- Addresses are specific to each site and not shared across the research organization.
- Once you specify a From Address or Bill To Address on an invoice, SiteVault automatically defaults to the last-used addresses on subsequent invoices for that study, but this is editable.
2. Review and Edit Invoice Details
Select the Edit icon (pencil) to open the Invoice Details Panel and update the following fields:
- Invoice Number: This field is auto-generated but can be edited.
- External Invoice Number: An optional field for sites using an external billing system that need to reference an additional invoice number.
- Purchase Order Number: An optional field to populate if a purchase order number is associated with the invoice.
- Invoice Date: Required to advance and mark an invoice as Sent.
- Payment Terms: The selected payment terms are applied to the Invoice Date to calculate and populate the Payment Due Date field.
- Comments (Optional): Enter site-specific comments or instructions to appear on the invoice document (e.g., notes regarding screen failures or payment application). Comments are specific to the individual invoice and do not carry over to subsequent invoices.
3. Review Billable Items
Review the list of billable items and adjust as necessary:
- Remove Billable Item: Select one or more items (Accrued or Invoiced) and select Remove from Invoice from the bulk menu, or hover to the right of an item number and select the X. Removing items automatically updates the outstanding balance.
- Add Billable Item: Select + Billable Item, choose one or more items to add to the invoice, and select Save.
4. Preview the Invoice Document
While editing an invoice, select Preview Invoice Document to view the generated invoice document before finalizing:
- The document includes a summary table of billable items, explicit details for associated participants and dates, your From and Bill To addresses, and any invoice Comments.
- If your site has uploaded a logo in Administration > Sites > Your Site > Branding, it will appear at the top of the generated invoice document. If no logo is uploaded, the header space remains blank.
5. Additional Steps
- Export Billable Items: Select All Actions > Export Billable Items to export the invoice’s billable items to a CSV file if you need to combine or manipulate data in an external system.
- Advance Invoice Status: Once your invoice details are confirmed, you can advance the invoice to Ready to Send.