Who can complete this task?
- Administrators and Site Staff with the Study Schedule Design & Management Extended Permission
Overview
The Schedule tab allows you to specify study activities and create relationships to the visits in which the activities occur. You can add activities from the Activities Library or create them right in the schedule. Activities can also have associated billing codes to streamline the activity-to-invoicing process.
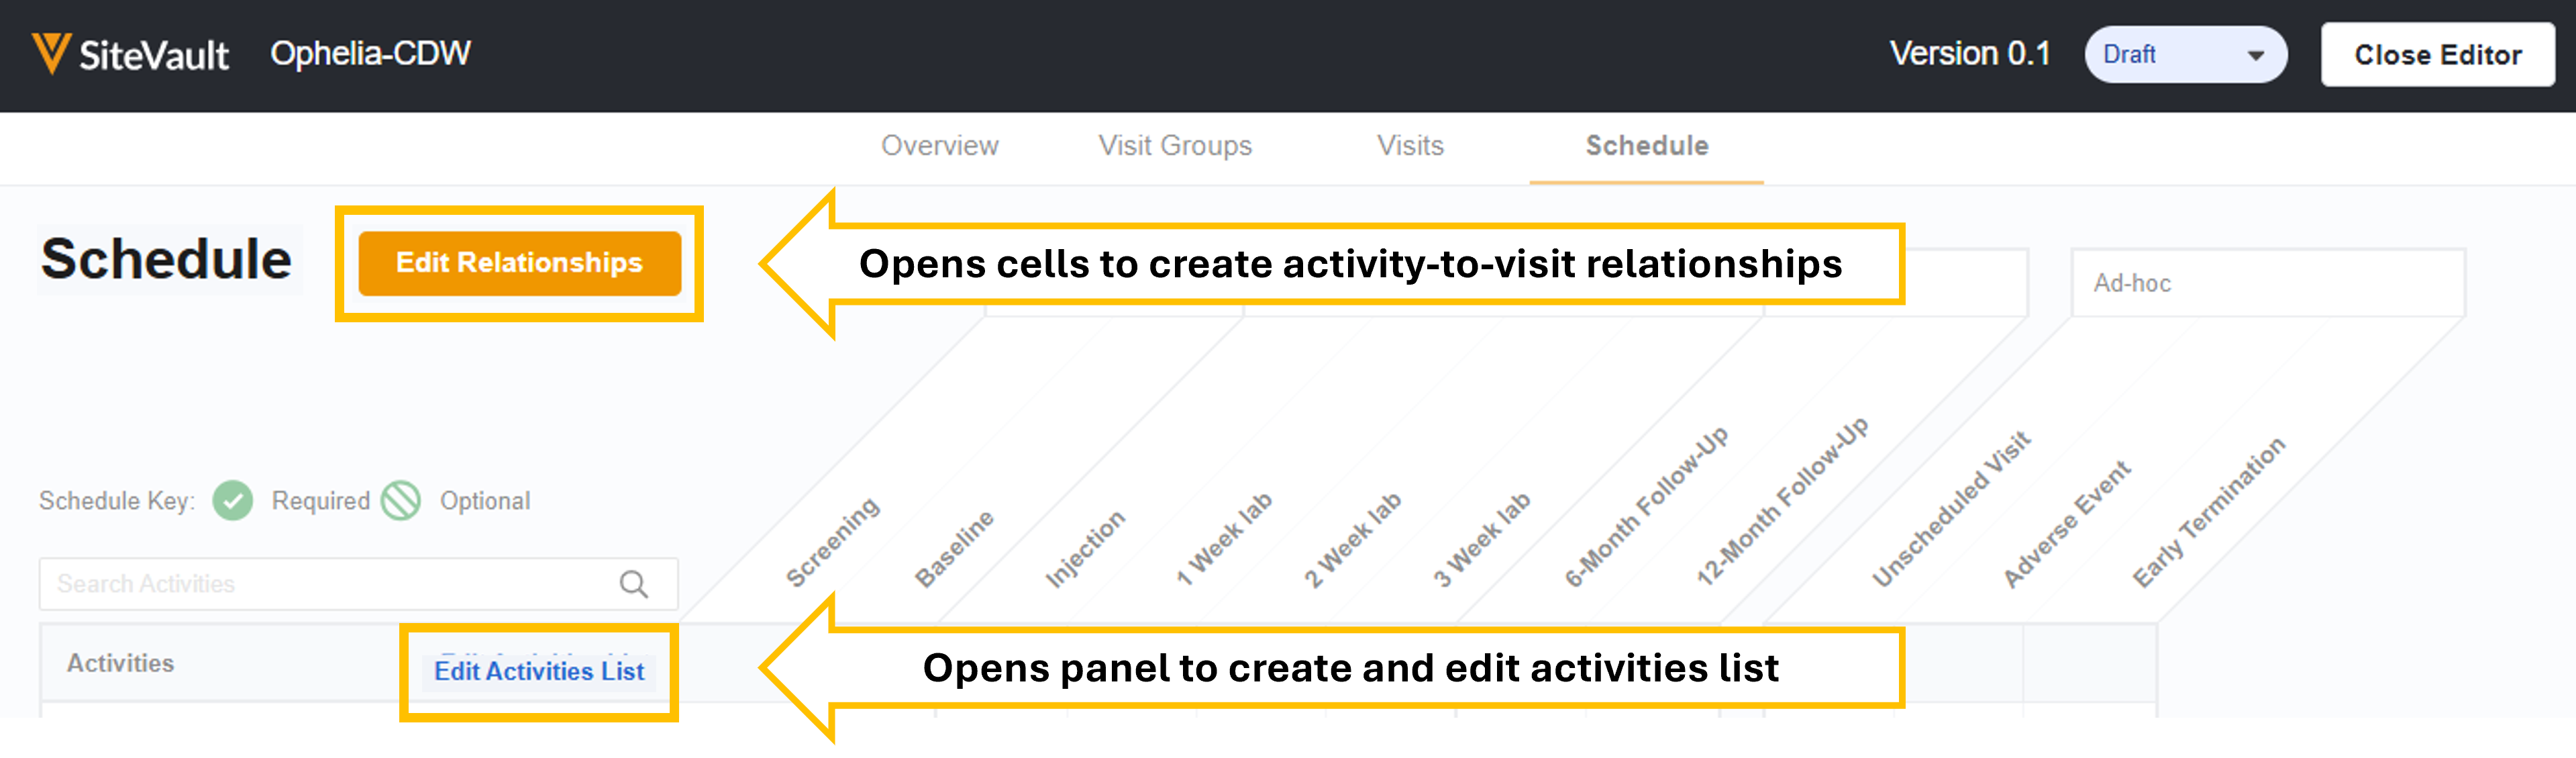
Add Activities (Connect Activities to a Visit)
Add all relevant activities from your protocol.
To add activities to your schedule, complete the steps below:
- Within the Schedule Editor, navigate to the Schedule tab. Your defined groups/phases and visits are listed along the top.
- Select Edit Activities List.
- Select + Add from Library
- Select all applicable activities.
- Select Save.
- To create activities not available in the library, scroll down and select + Create Custom Activity.
- Enter a name for the activity.
- To add the custom activity to the Activity Library, select the Actions Menu (…) and Add to Activity Library.
- Ensure the name appears as it should on the Activity Template. This name cannot be changed once the template is added to a study.
- Designate whether the activity should be automatically added to new study schedules.
- Select Save.
- For all activities, complete the following:
- Enable the repeat option if an activity (ex., a pregnancy test, a physical exam) is expected to be repeated at any visit.
- When a repeatable activity is required for a specific visit, you will have an option to specify the expected number of repetitions for that activity within that visit.
- Select Save.
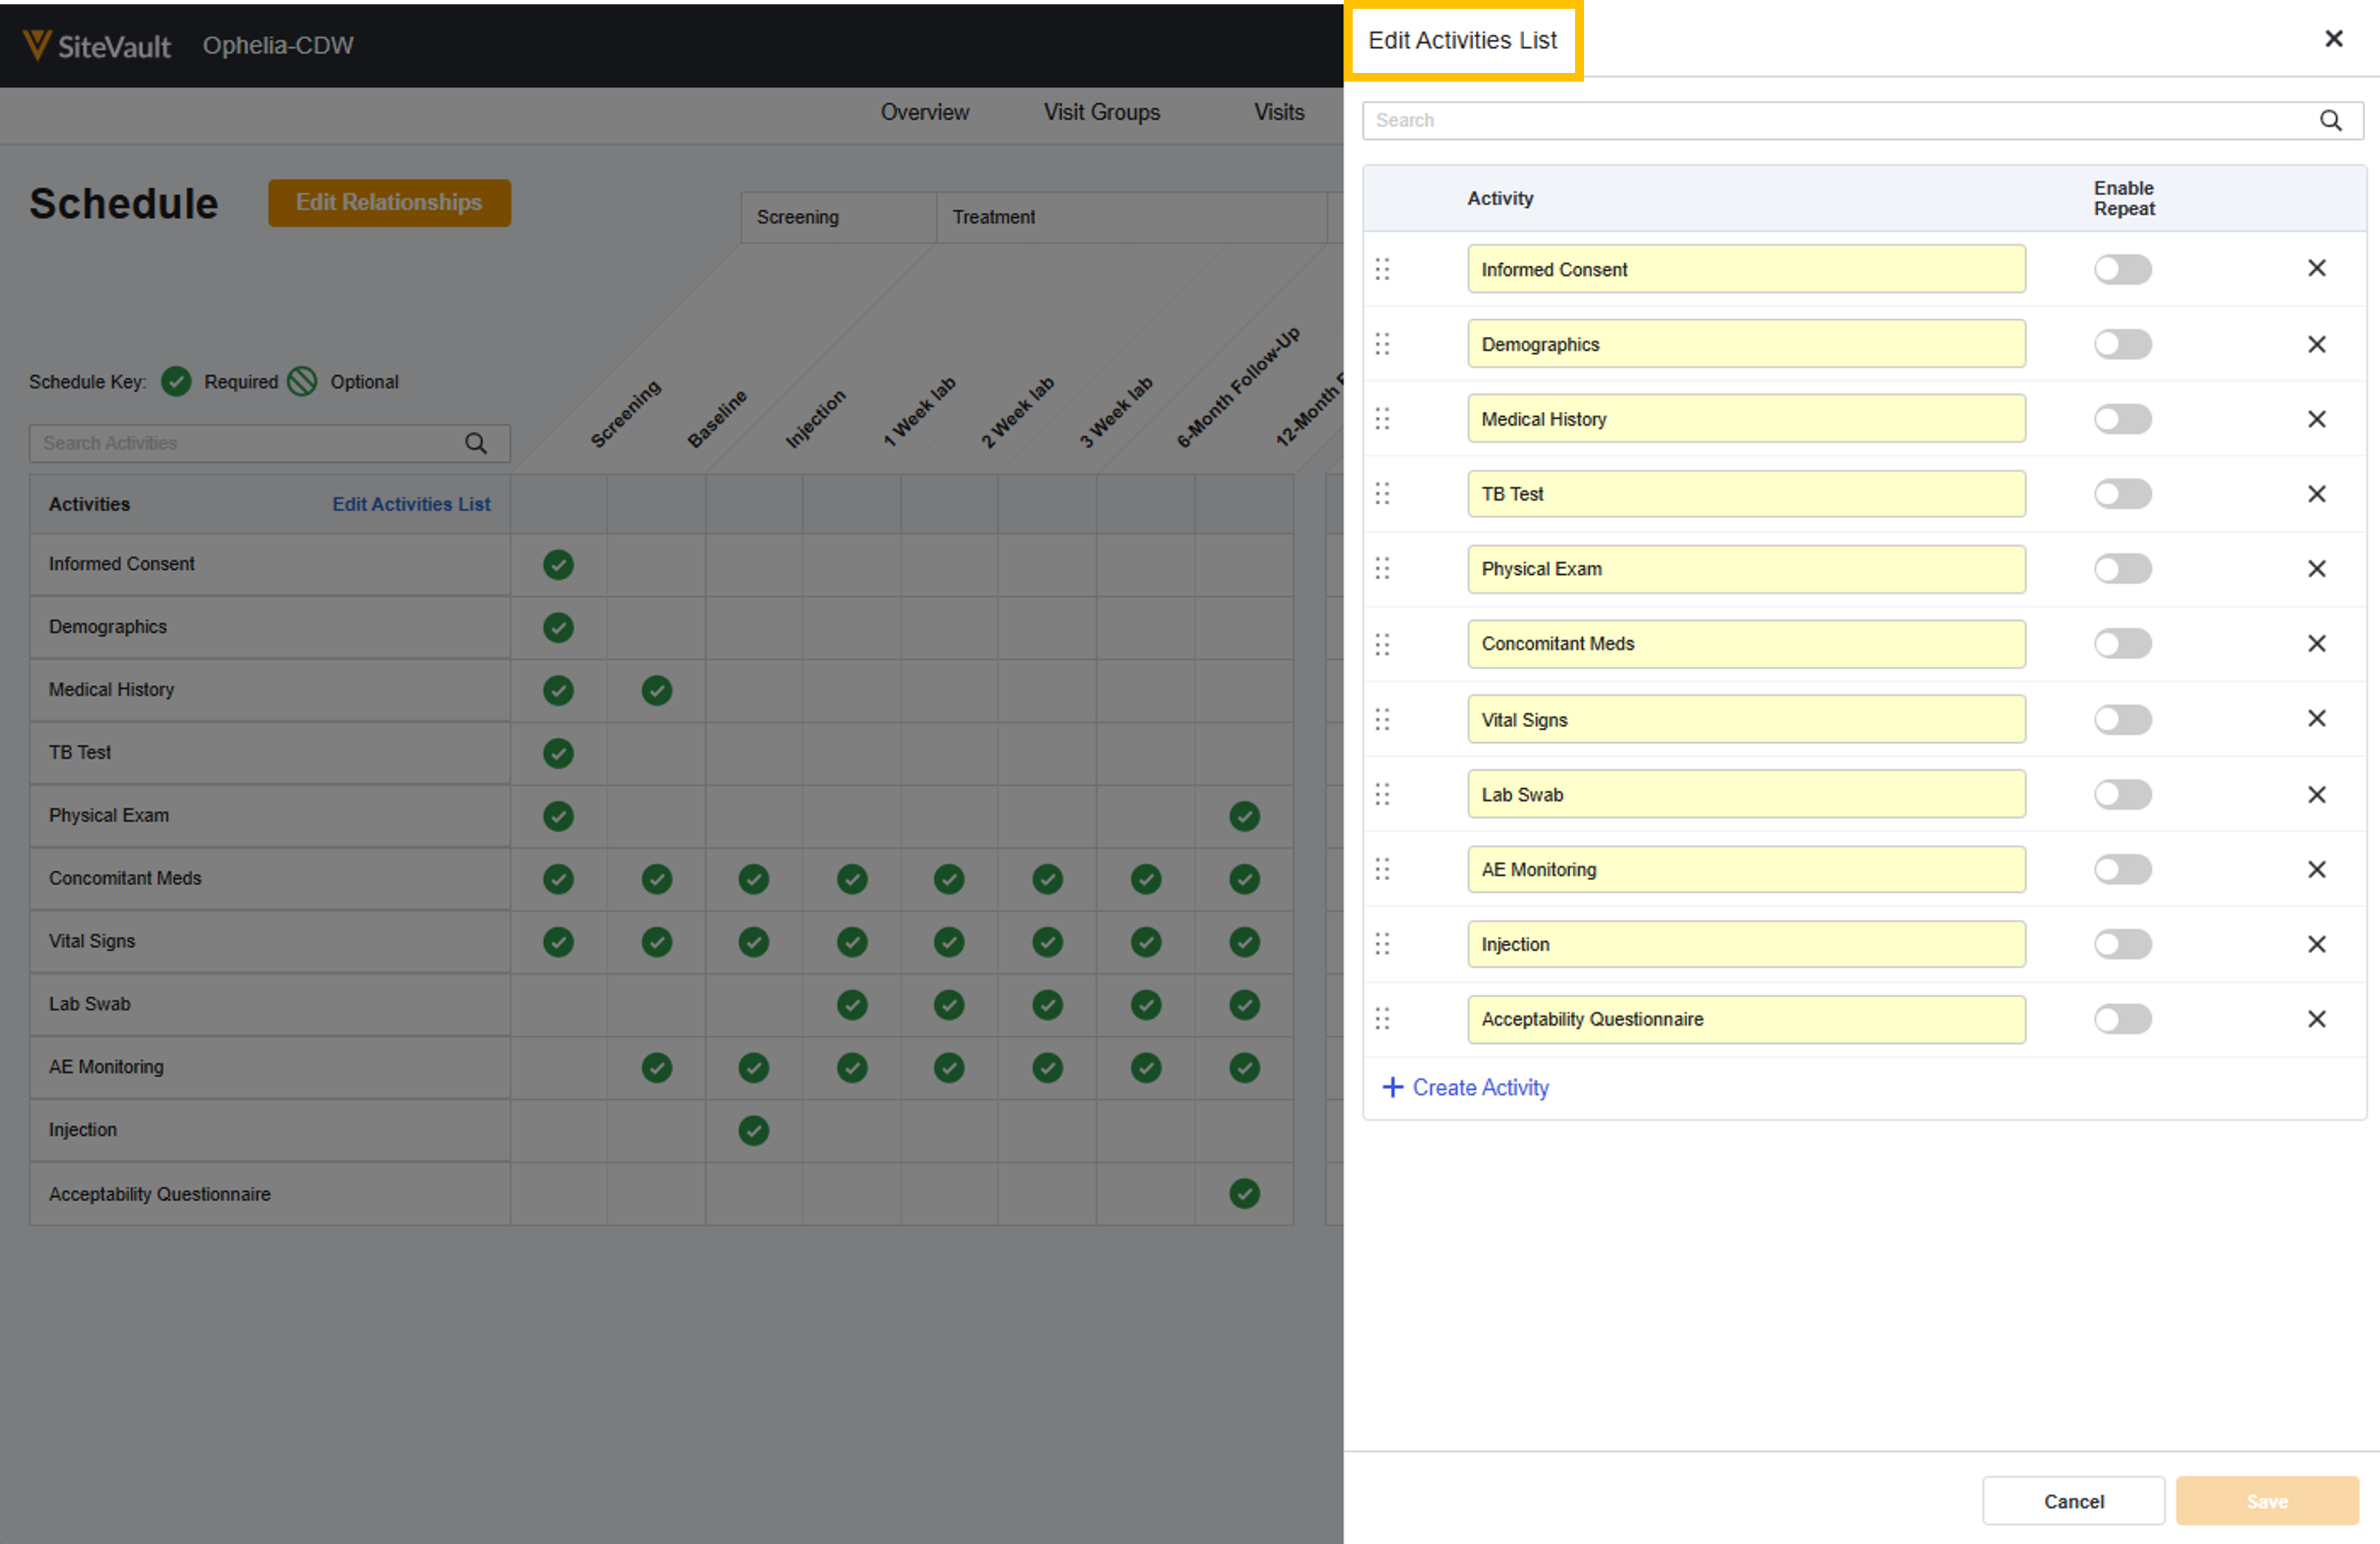
Add Relationships
The visits groups and related visits are displayed along the top of the schedule. Activities are listed along the left. Use the cell tools to indicate when activities should be included in a visit.
To add relationships to your schedule, complete the steps below:
- Within the Schedule Editor, navigate to the Schedule tab. Your defined groups/phases and visits are listed along the top.
- Select Edit Relationships.
- Select a cell to indicate that the activity should occur in the associated visit.
- A single click indicates a required activity.
- A second click indicates an optional activity.
- Continue clicking to cycle through options.
- If the activity is required and repeatable, you are prompted to define the expected number of repetitions for that activity within that specific visit.
- Repeat these steps for each activity.
- Select Save.