Set Up Your SiteVault
Administrator steps to setting up their SiteVault
Introduction
This guide walks you through the initial steps of setting up your site in SiteVault. To access the content in this guide as well as more helpful administration tools, see the SiteVault Administration tab.
Pro Tip: To launch linked pages without losing your place in the guide, right-click links and select to open in a new tab.
SiteVault Help
SiteVault Help is packed with detailed articles, FAQs, and even video tutorials to answer any questions that might come up along the way. Getting comfortable with our help system will be a valuable skill as you continue to use SiteVault.
- Explore the site to become familiar with navigating the different sections.
- Use the search bar to quickly find answers to specific questions.
- Use the Chat widget to reach out for additional support.
Additional Support
If you need assistance, please reach out to our Site Support team.
Welcome to SiteVault!
Managing a Site-Owned System
Congratulations! You’ve made a great decision for your site and for the future of clinical research. SiteVault is built for YOU, the site, to manage one or all of your studies. Veeva SiteVault is site-owned and managed. This means you manage access to the system, are responsible for adding staff, and can decide your site’s level of use.
SiteVault System Information
Veeva SiteVault is fully validated by Veeva and supports compliance with 21 CFR Part 11, HIPAA, Annex 11, and GDPR. We know that system documentation is important, which is why you can access a SiteVault validation certification document anytime to demonstrate security and compliance for any of your study partners.
In preparation for using a new tool, Veeva recommends that you update your own internal documentation as well. Consider creating new or revising any existing standard operating procedures (SOPs).
SiteVault Features
SiteVault is a powerful solution for managing all of your site’s documentation across all of your studies. In this one application, you can find the following features:
- Study eBinder to easily manage and track your study documentation progress
- Veeva eConsent to electronically consent participants across some or all of your studies
- Site Documents eBinder to organize and manage your site business documentation (non-study-specific)
- Document workflows (for example, eSignature, certified copy, training, and more)
- Digital delegation to generate your Delegations of Responsibilities Log
- Monitoring tools and workflows
- Reports and dashboards
Sign Up for SiteVault
If a specific study has brought you here, be mindful of the study timeline and gain access to SiteVault as early as possible. The sooner you grant access to your study team, the sooner they can experience the system and start working on studies.
Your Site has Previously Used SiteVault
- If anyone at your organization has previously used SiteVault, contact the current SiteVault user to gain access to the SiteVault.
- If the current SiteVault user is no longer at your organization, complete the User Role Change Request form to get started.
- Should you need assistance identifying the current SiteVault user at your organization, please reach out to our Site Support team.
Your Site is New to SiteVault
Please complete the SiteVault signup form. This form will collect pertinent information about your site and require you to sign a Terms of Service.
The site staff member who completes the sign-up form is designated as the initial Site Administrator for your SiteVault account. The initial Site Administrator can later assign other users as additional Site Administrators.
Single Sites & Multi-Site Organizations
SiteVault is structured to accommodate a single research site seeking a tool to organize its study materials or a research organization with oversight over multiple sites. This page offers definitions of those relationships as you will find references to both scenarios throughout this documentation.
Definitions
- Research Organization: A research organization is any university, research institute, or legal entity that conducts clinical research.
- Research Site: Distinct research team, department, institute, or location within a research organization. There may be only one or multiple research sites within a research organization.
- Research Team: A group of research staff who conduct studies with sponsors in a specific therapeutic area. At larger research organizations, there may be multiple distinct teams within a research site.
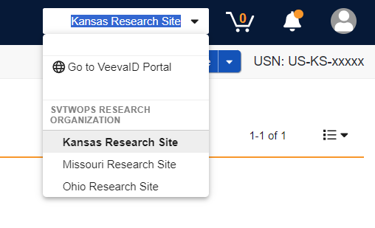
Navigating Your Organization
For Research Organization Administrator users and users with access to more than one site, the value selected in the Vault Selector determines the documents and data that can be accessed.
Information Shared across Organizations
The following items can be shared across an organization:
- Site Documents:
- Profile documents
- Standard Operating Procedures
- Digital Delegation Responsibilities records
- Organization records
Research Organization Administrators can select their research organization in the Vault Selector to view all site-specific and organization-wide items across your research organization.
Confirm or Edit Your Site Display Name
- Administrators
Site Name
The record for your site displays information such as the name, research organization, and Universal Site Number (USN) of your site. Research Organization and Site Administrators can edit the Display Name of the site (which appears in the vault selector and is initially assigned by Veeva) if needed.
- Navigate to Administration > Sites.
- Select the record for the site that’s currently selected in the vault selector. Research Organization Administrators can select their research organization in the vault selector to view all sites in their organization.
- Review site information for accuracy.
- To edit, select Edit on the record detail page.
To enable or disable SiteVault features for your site, expand the Site Settings section and select or deselect the checkboxes as needed.
Research Organization Name
To view the record for your research organization, select the link for the organization while viewing a Site record.
Research Organization Administrators can edit the Display Name of the research organization (which appears in the vault selector and is initially assigned by Veeva) if needed. To do so, select Edit on the Research Organization record.
Universal Site Number (USN)
The USN is a unique number for your site that is assigned by Veeva after your SiteVault sign-up is approved. It can be used to connect your SiteVault to Site Connect to exchange documents and information on connected studies. For more information, see SiteVault and Site Connect.
Site Administrators
Your role in SiteVault is to keep SiteVault secure through user administration and to keep your studies moving forward. You have the ability to create and manage studies as well as drive staff activity within those studies.
As you use this documentation, you will see the administrative tasks are sometimes separated from the non-administrative tasks. This layout allows non-administrative users (Staff) to quickly locate their task instructions without having to review items that do not apply to them. While Staff cannot complete those tasks, you are able to complete both administrative and non-administrative tasks.
Visit the SiteVault Administration tab for more information on your role and tasks.
Identify an Additional Administrator
As only Site Administrators can complete certain tasks, we recommend that you designate at least one other staff member as a backup administrator.
Helpful characteristics of a Site Administrator:
- Comfortable with technology
- Leader or manager
- Organized
You can promote a Site Staff user to a Site Administrator user as a temporary or permanent assignment.
Create Users
Creating individual user accounts and assigning them to studies allows you to efficiently send documents for electronic signature and training, securely upload their profile documents, and include them into the digital delegation log.
- Administrators
Overview
When you create a new SiteVault user for your site, you can choose from a set of system roles and, if needed, additional add-on permissions. See the About System Roles and Add-on Permissions page to learn more about what levels of access these roles and permissions provide.
For full access to the organization’s user administration, Research Organization Administrators (ROA) should also be added as Site Administrators at each site in their organization. ROA users can add users to one or more sites at a time when the research organization is selected in the vault selector. Site Administrators can only add users to their currently selected site.
For more access information, see About Roles and Permissions, or download the SiteVault Security Matrix or SiteVault User Access Guide.
Creating a Staff User
Complete the following steps to create a new Staff user or add an existing Vault Staff user to SiteVault:
- Access the Administration > Staff tab and select Create.
- Enter and re-enter the user’s email address, then select Check Email.
- If a user with that email address already exists in your research organization, enter an email address unique to your research organization.
- If one or more existing Vault user accounts are found, select the appropriate user account.
- If no Vault user accounts are found, continue creating the user.
- Complete the First Name and Last Name fields.
- Indicate if the user is an investigator.
- If applicable, complete any SiteVault Enterprise-specific fields:
- User Account Login Method: Select the appropriate login method.
- User Name: Enter a user name.
- Federated ID: Enter the user’s Federated User ID.
- Complete the Create as field:
- Select Staff with User Account if the individual is expected to access SiteVault.
- Select Staff (No SiteVault Access) if the individual is not expected to access SiteVault.
- Select Next.
- Optionally, select any additional sites, then select Next.
- For each site selected, select the user’s system role and any additional permissions (if selecting Site Staff). Use Apply to All Sites to apply the selected settings to all sites. To adjust, select a site and make changes.
- If the Create as field is populated with Staff (No SiteVault Access), then the role Site Staff (No SiteVault access) is selected for all sites.
- Select Save.
When it’s time to add external users, such as a monitor or auditor, the steps are nearly identical to the steps above. To learn more about the controlled access you can offer to external users, see Monitors and External Users Access and Limitations. For more information on creating a SiteVault account for an external user, see Create a Monitor or External User.
Site Documents
You can use SiteVault to store and manage your site’s business process documents. These documents provide evidence of your site’s internal processes and operations. While a sponsor or monitor may request to review these documents for your site to participate in a study, they are not related to any specific study.
Upload site and staff documentation to the Site eBinder. The Site eBinder organizes your site’s non-study-related business documents or documents. Documents in the Site eBinder can be sent to users for approval, training, or eSignatures.
- Administrators & Site Staff
The Site eBinder upload process includes the option to move documents to their steady state or initiate a workflow. Documents uploaded to the eBinder are also available in the Document Library.
- Access the Site eBinder.
- Select one of the following upload methods:
- Upload (select the Upload button):
- Select the locally saved documents.
- Select Open.
- Drag and Drop:
- With Site eBinder open, select the locally-saved documents on your computer.
- Use your cursor to drag and drop documents from a local folder to an eBinder folder or the eBinder table.
- Upload (select the Upload button):
- For each document:
- Select the Document Type.
- Select the upload state:
- Draft: The document requires additional processing/review (updates, signatures, etc.).
- Final State (state label depends on Document Type chosen in the previous step): Document is complete with no further processing needed.
- Additional Actions:
- To perform Copy Certification, select Additional Actions > Perform Copy Certification. If the document is a Source document, verify if the document is an exact or redacted copy.
- To initiate a workflow, select the appropriate workflow from Additional Actions. Complete the required fields in the Start Workflow dialogue.
- Enter a description of the document. Include details not captured in other document fields.
- Complete the Document Date field with the most meaningful date to uniquely identify this document version (eg., version date, approval date, log end date, meeting date, etc.).
- Complete the optional Start Date field. This date should reflect the earliest date of recording/capturing in this document. The latest date of data recording in this document should be added in the Document Date or End Date fields.
- If applicable, complete the Expiration Date field with the date on which the document is due to expire.
- Populate the remaining fields.
- Select Save to complete the process.
For more information, see About Site Documents and the Site eBinder.
Business Plan and SOPs
Document a business plan or standard operating procedure (SOP) addressing your planned use for SiteVault. This assists in communicating any new procedures to your staff as well as guidelines to reference as needed.
Common setup SOPs to consider:
- User Account Management and Training
- Source/Remote Monitoring
- Use of Certify as Copy
- Use of eSignature
- Use of an eISF
For more help determining what SOPs you may need to modify or create when implementing SiteVault, see the SOP Needs Assessment.
Audits & Inspections
Now that your SiteVault is ready to go, a good next step is to review our audit resources to learn how to prepare for any upcoming reviews. Follow the link below to navigate away from this guide and to the Audit & Inspection Readiness page found in the Getting Started tab of SiteVault Help.