Who can complete this task?
- Administrators & Site Staff
Overview
You can easily add one, several, or all visits, however, you should evaluate each participant’s scenario to choose the appropriate approach.
- Phased Approach: It is generally recommended to add visits in phases (ex. add only the screening phase initially, then add treatment phases once the participant progresses). This helps manage the patient’s journey more realistically and avoids generating unnecessary visits for participants who may screen fail.
- All at Once: If you plan to schedule visits very far in advance, you can add all visits upfront.
- Existing Studies: If you are migrating an ongoing study into CTMS, you would typically add all visits and then retroactively apply the dates and mark complete visits that have already occurred.
Note: New participants are assigned the current schedule version. Update the participant’s schedule version as needed due to adding the participant mid-study or cohort requirements.
Add Expected Visit(s) from the Visit Schedule
- Navigate to Studies > Select Study > Participants.
- Select the participant.
- Select Visits.
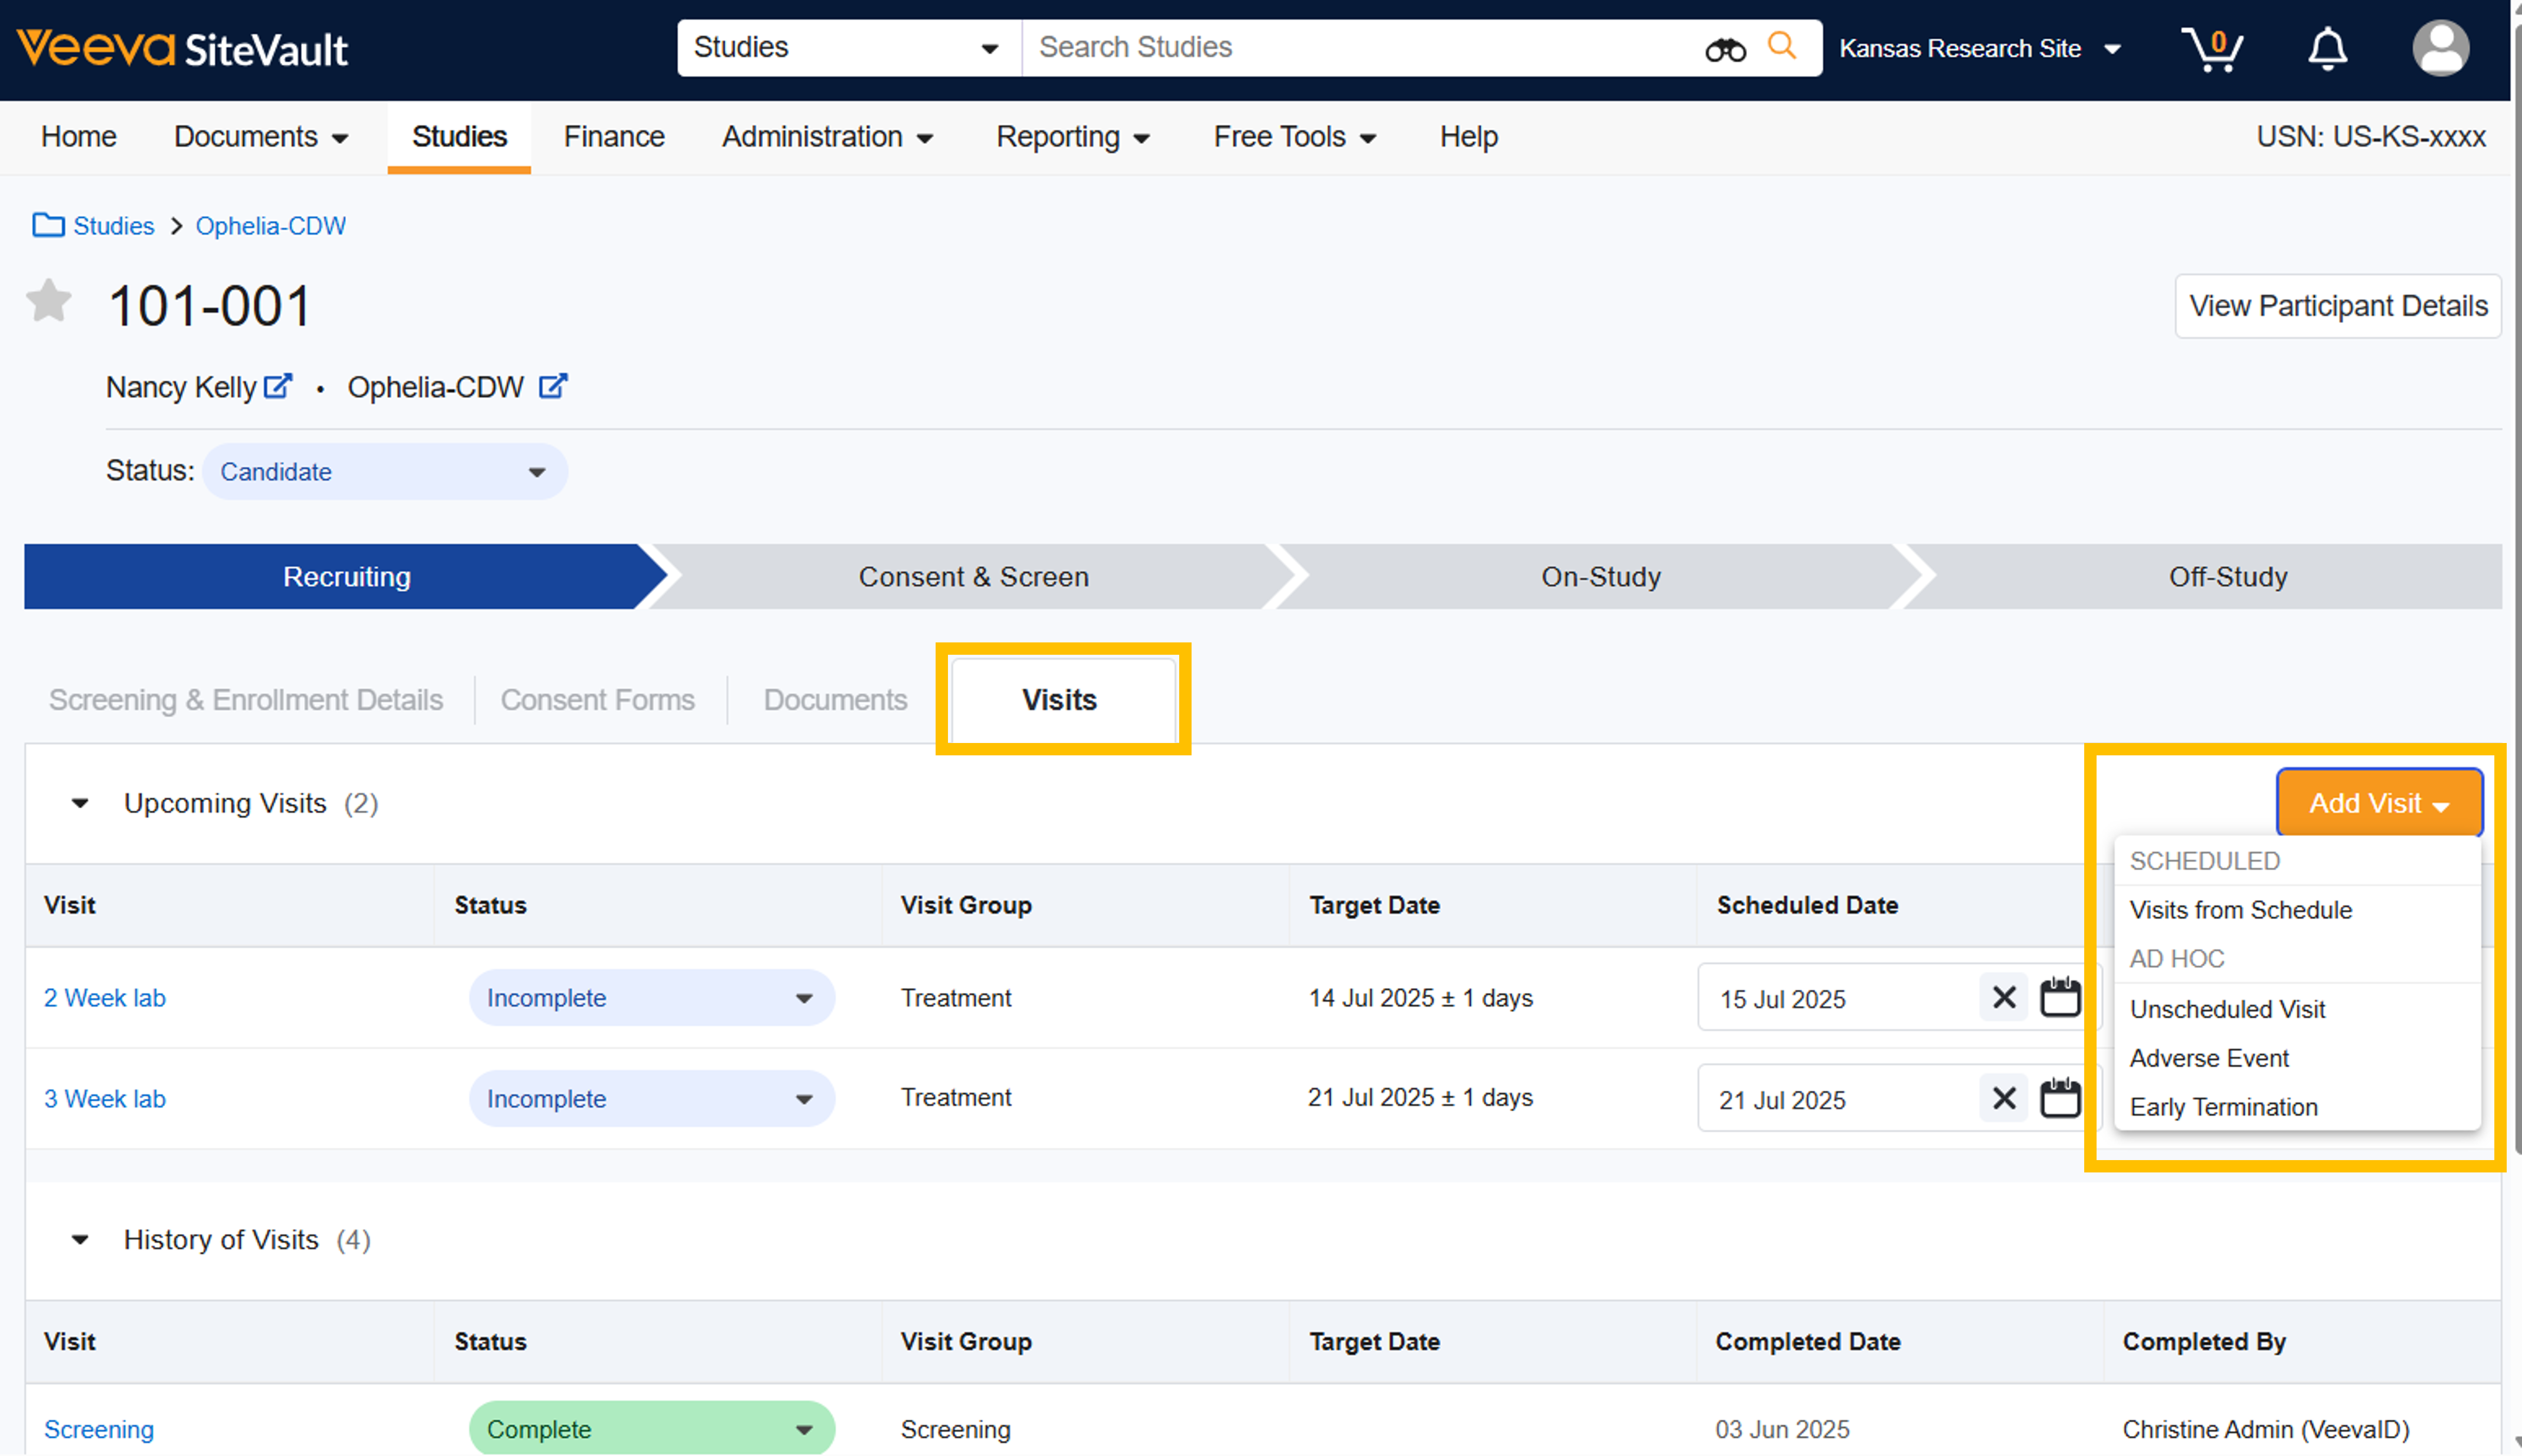
- Select Add Visit.
- Select Visits from Schedule
- From the Visit Schedule diagram, select one or more visits and/or visit groups to add.
- Avoid unnecessary data entry and future corrections by adding visits to the CTMS only when a participant’s continued participation is highly probable. For example, do not add any visits beyond the screening visit until the participant successfully passes screening. See above for more guidance.
- Select Save. The added visits are listed in Upcoming Visits.
- You can choose to take no further action or choose to:
- Schedule one or more visits:
- For each visit you want to schedule, select a date from the associated calendar. The date should occur within the visit window (Target Date and before or after windows) listed in the Target Date column. Once selected, the future visits’ target dates are updated.
- Complete a visit:
- To confirm or modify the set of activities to occur during a visit:
- Select the visit.
- Note the following:
- Add repetitions to activities completed more than once.
- Check the boxes for any skipped activities.
- Add any optional activities by selecting the plus icon (+).
- Select the Edit icon to update any additional details or add a note.
- Change the Status to Completed.
- Select the Completed Date.
- Select Save.
- To complete a visit from the list of scheduled visits:
- Update the Status to Completed.
- Select the Completed Date.
- Optionally, enter additional information in Notes.
- Select Save. Note: Completed visits may not be modified, but may be reopened so long as billable items associated with the visit have not been invoiced.
- To confirm or modify the set of activities to occur during a visit:
- Schedule one or more visits: