- Administrators and Site Staff with the Study Schedule Design & Management Extended Permission
Overview
The schedule’s visit group elements are tools that allow you to mimic the high-level schema or phases of your clinical trial, including any branching or arms. The visits and participant activities expected to occur within those groups are added in the next steps of schedule creation. When naming groups, keep in mind that users are presented with this structure when creating and scheduling participant visits.
This image displays the default schedule structure as well as some of the tools available to create your study schedule.
Access the Study Schedule
To open the Study Schedule, complete the steps below:
- Navigate to Studies > Select Study.
- Select View Study Details.
- Select Study Schedule from the Actions menu.
The schedule can be accessed from the Studies List, the View Study Details button, or the study’s Schedule tab.
Add Visit Groups/Phases
Refer to your study’s protocol, specifically the schema diagram or the schedule of events. The schedule of events is a good starting place to provide most of the necessary detail for defining these groups (ex. Screening, Treatment Phase, Follow-up). Once you’ve identified the basic flow of the study, consider and factor in additional details such as cohorts or crossover arms.
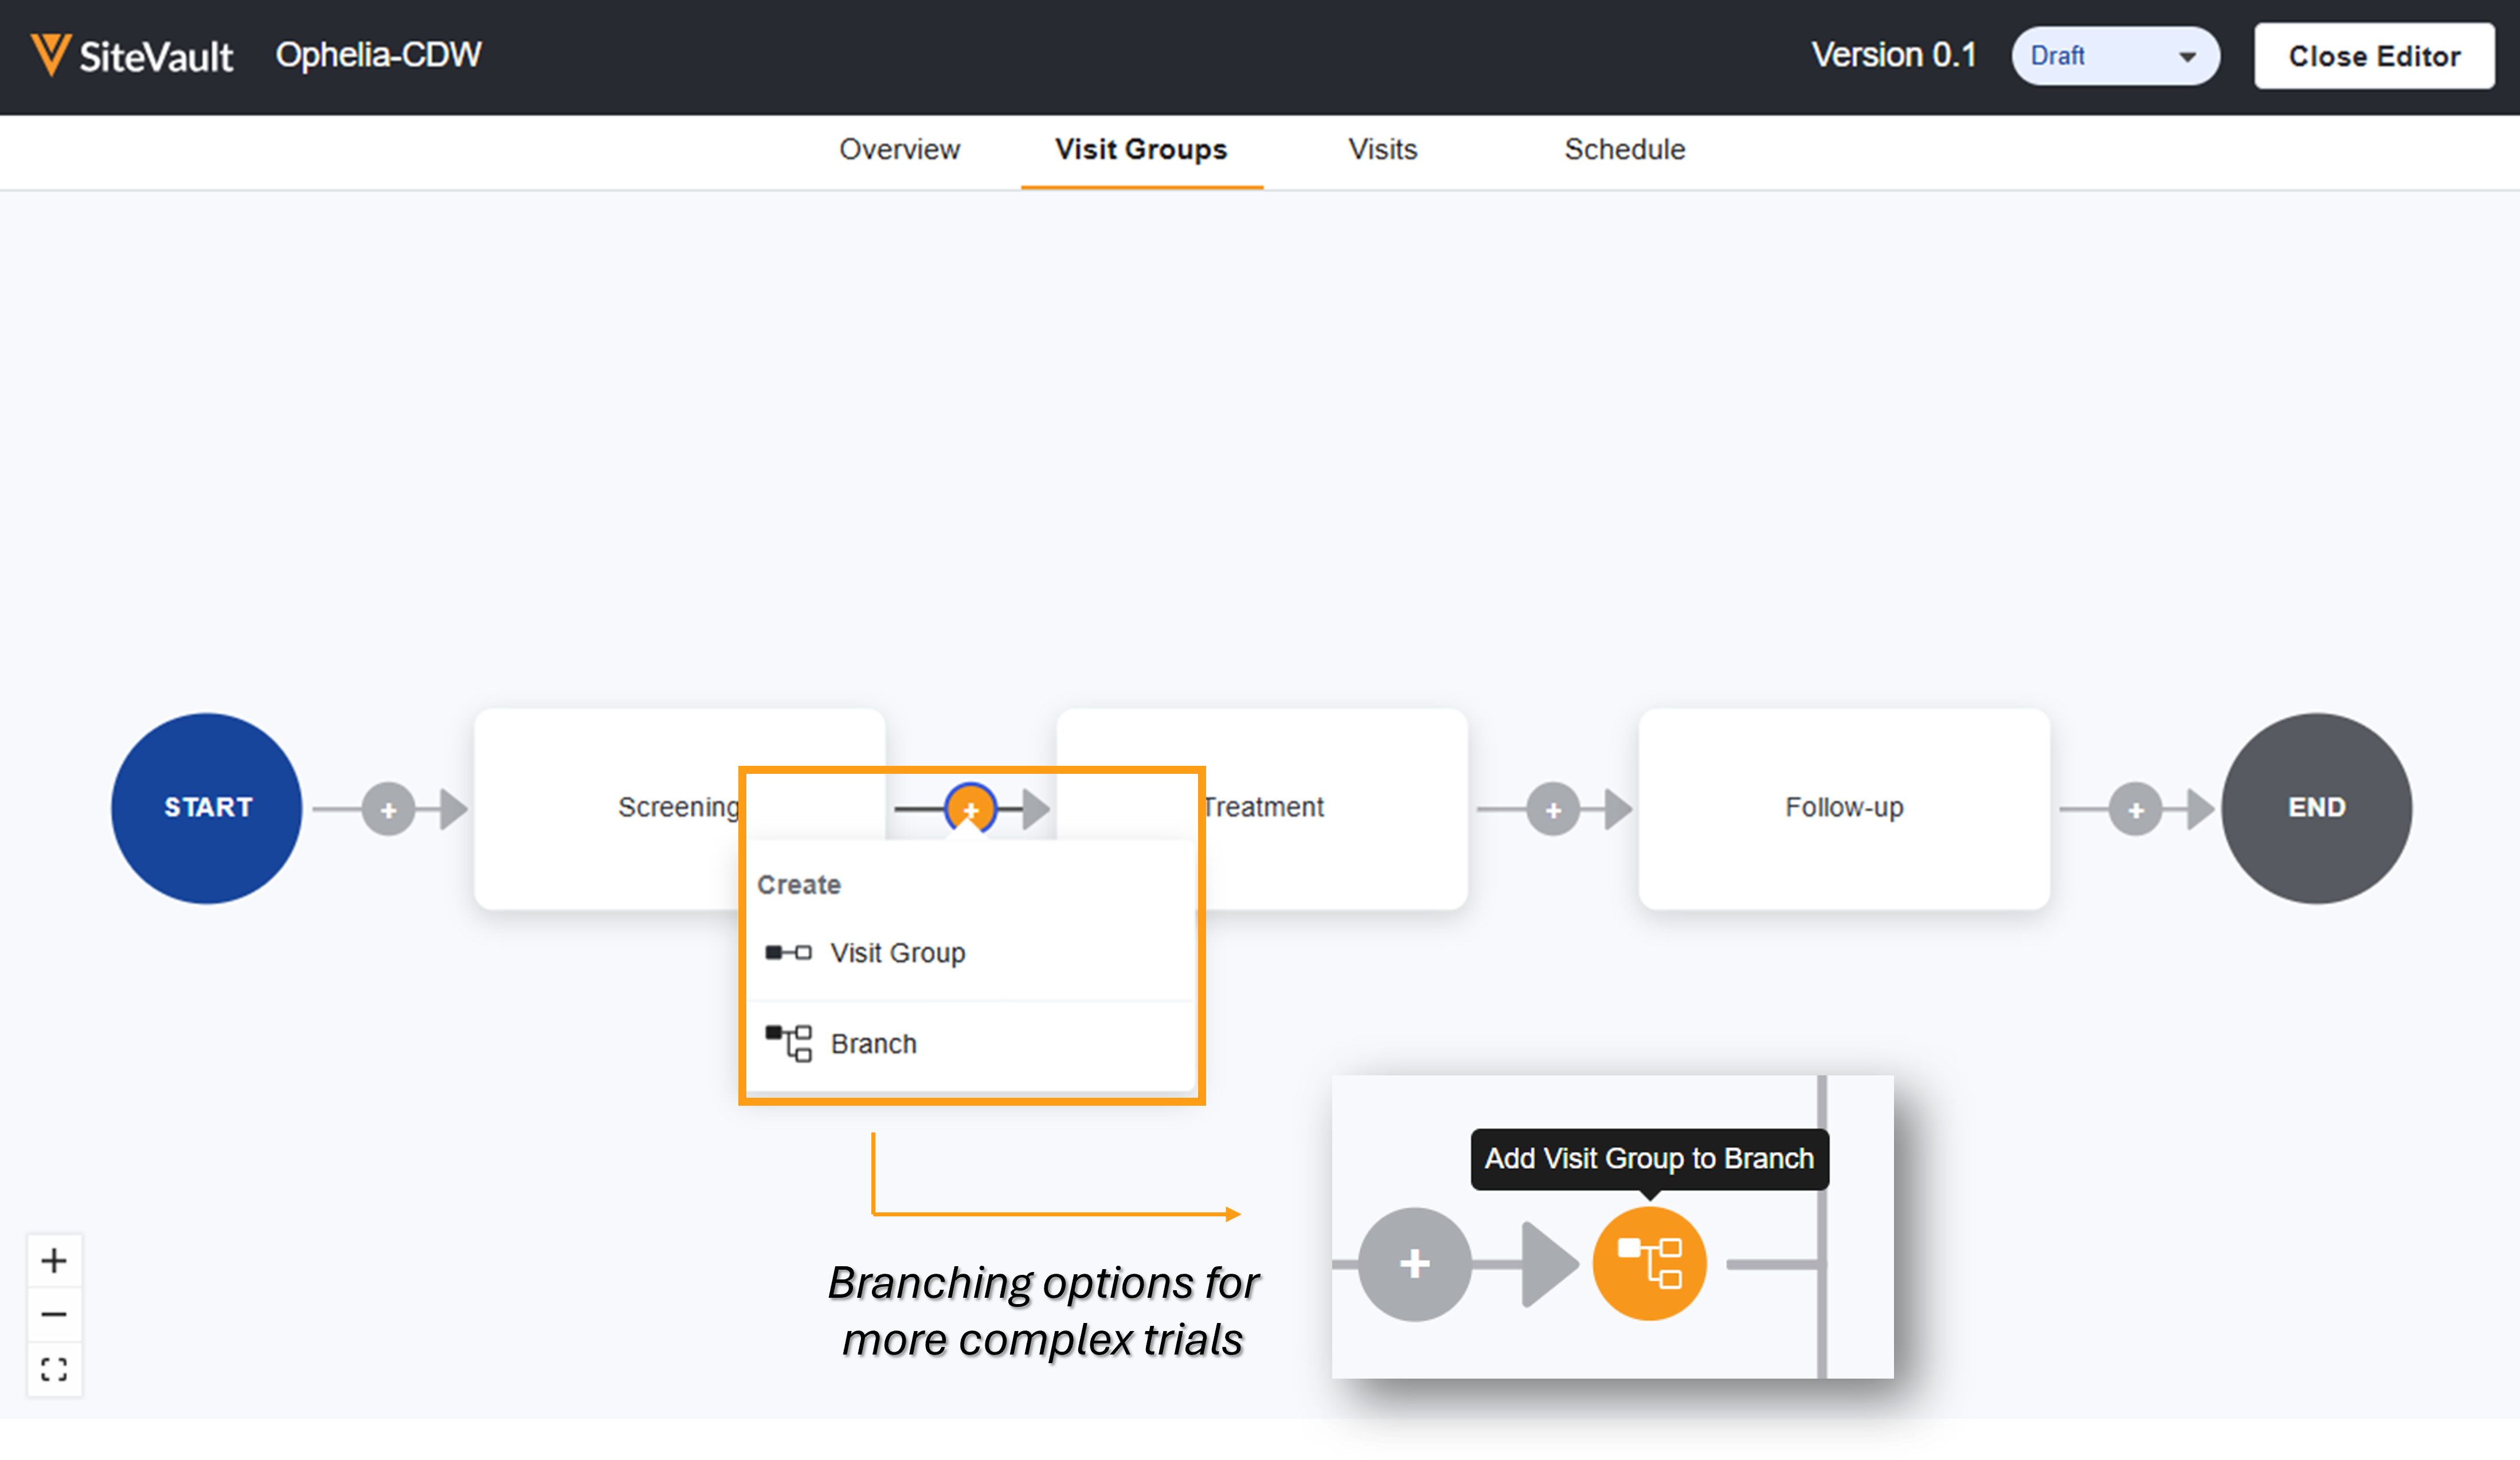
To add groups/phases to your schedule, complete the steps below:
- From the Study Schedule, select the Visit Groups tab.
- Select an element connector’s plus sign.
- Select one of the following:
- Visit Group: Adds a new, linear phase to your diagram.
- Branch: Used for more complex trials where participants might follow different paths or arms (ex., Arm A vs. Arm B). A branch splits your linear diagram into multiple nodes.
- Branch Visit Group: Used to add visit groups to branched schedules.
- Repeat these steps until the schedule structure meets the protocol requirements and your scheduling needs.
When To Use Branches
Adding branches to the diagram is only necessary if participants will experience a unique set of visits or treatment depending on their study arm or cohort, or if potential paths through the study are compensated at different rates.
Note: For blinded studies where all participant groups follow the exact same set of visits, branching is generally not used. Branching is reserved for situations where a unique set of visits or treatments is explicitly important for scheduling and coordinator awareness.
Assigning Study Arms to Branches
When branches are added to a study schedule, users may optionally associate a study arm with that branch. Associating study arms with specific branches on the schedule offers improved data filtering and reporting, easier participant scheduling and tracking, and smarter budget analysis. Assigning study arms to branches doesn’t change the actual schedule; they simply provide an additional way to view, sort, and learn from your data. See Study Arms for more information on enabling and key benefits.
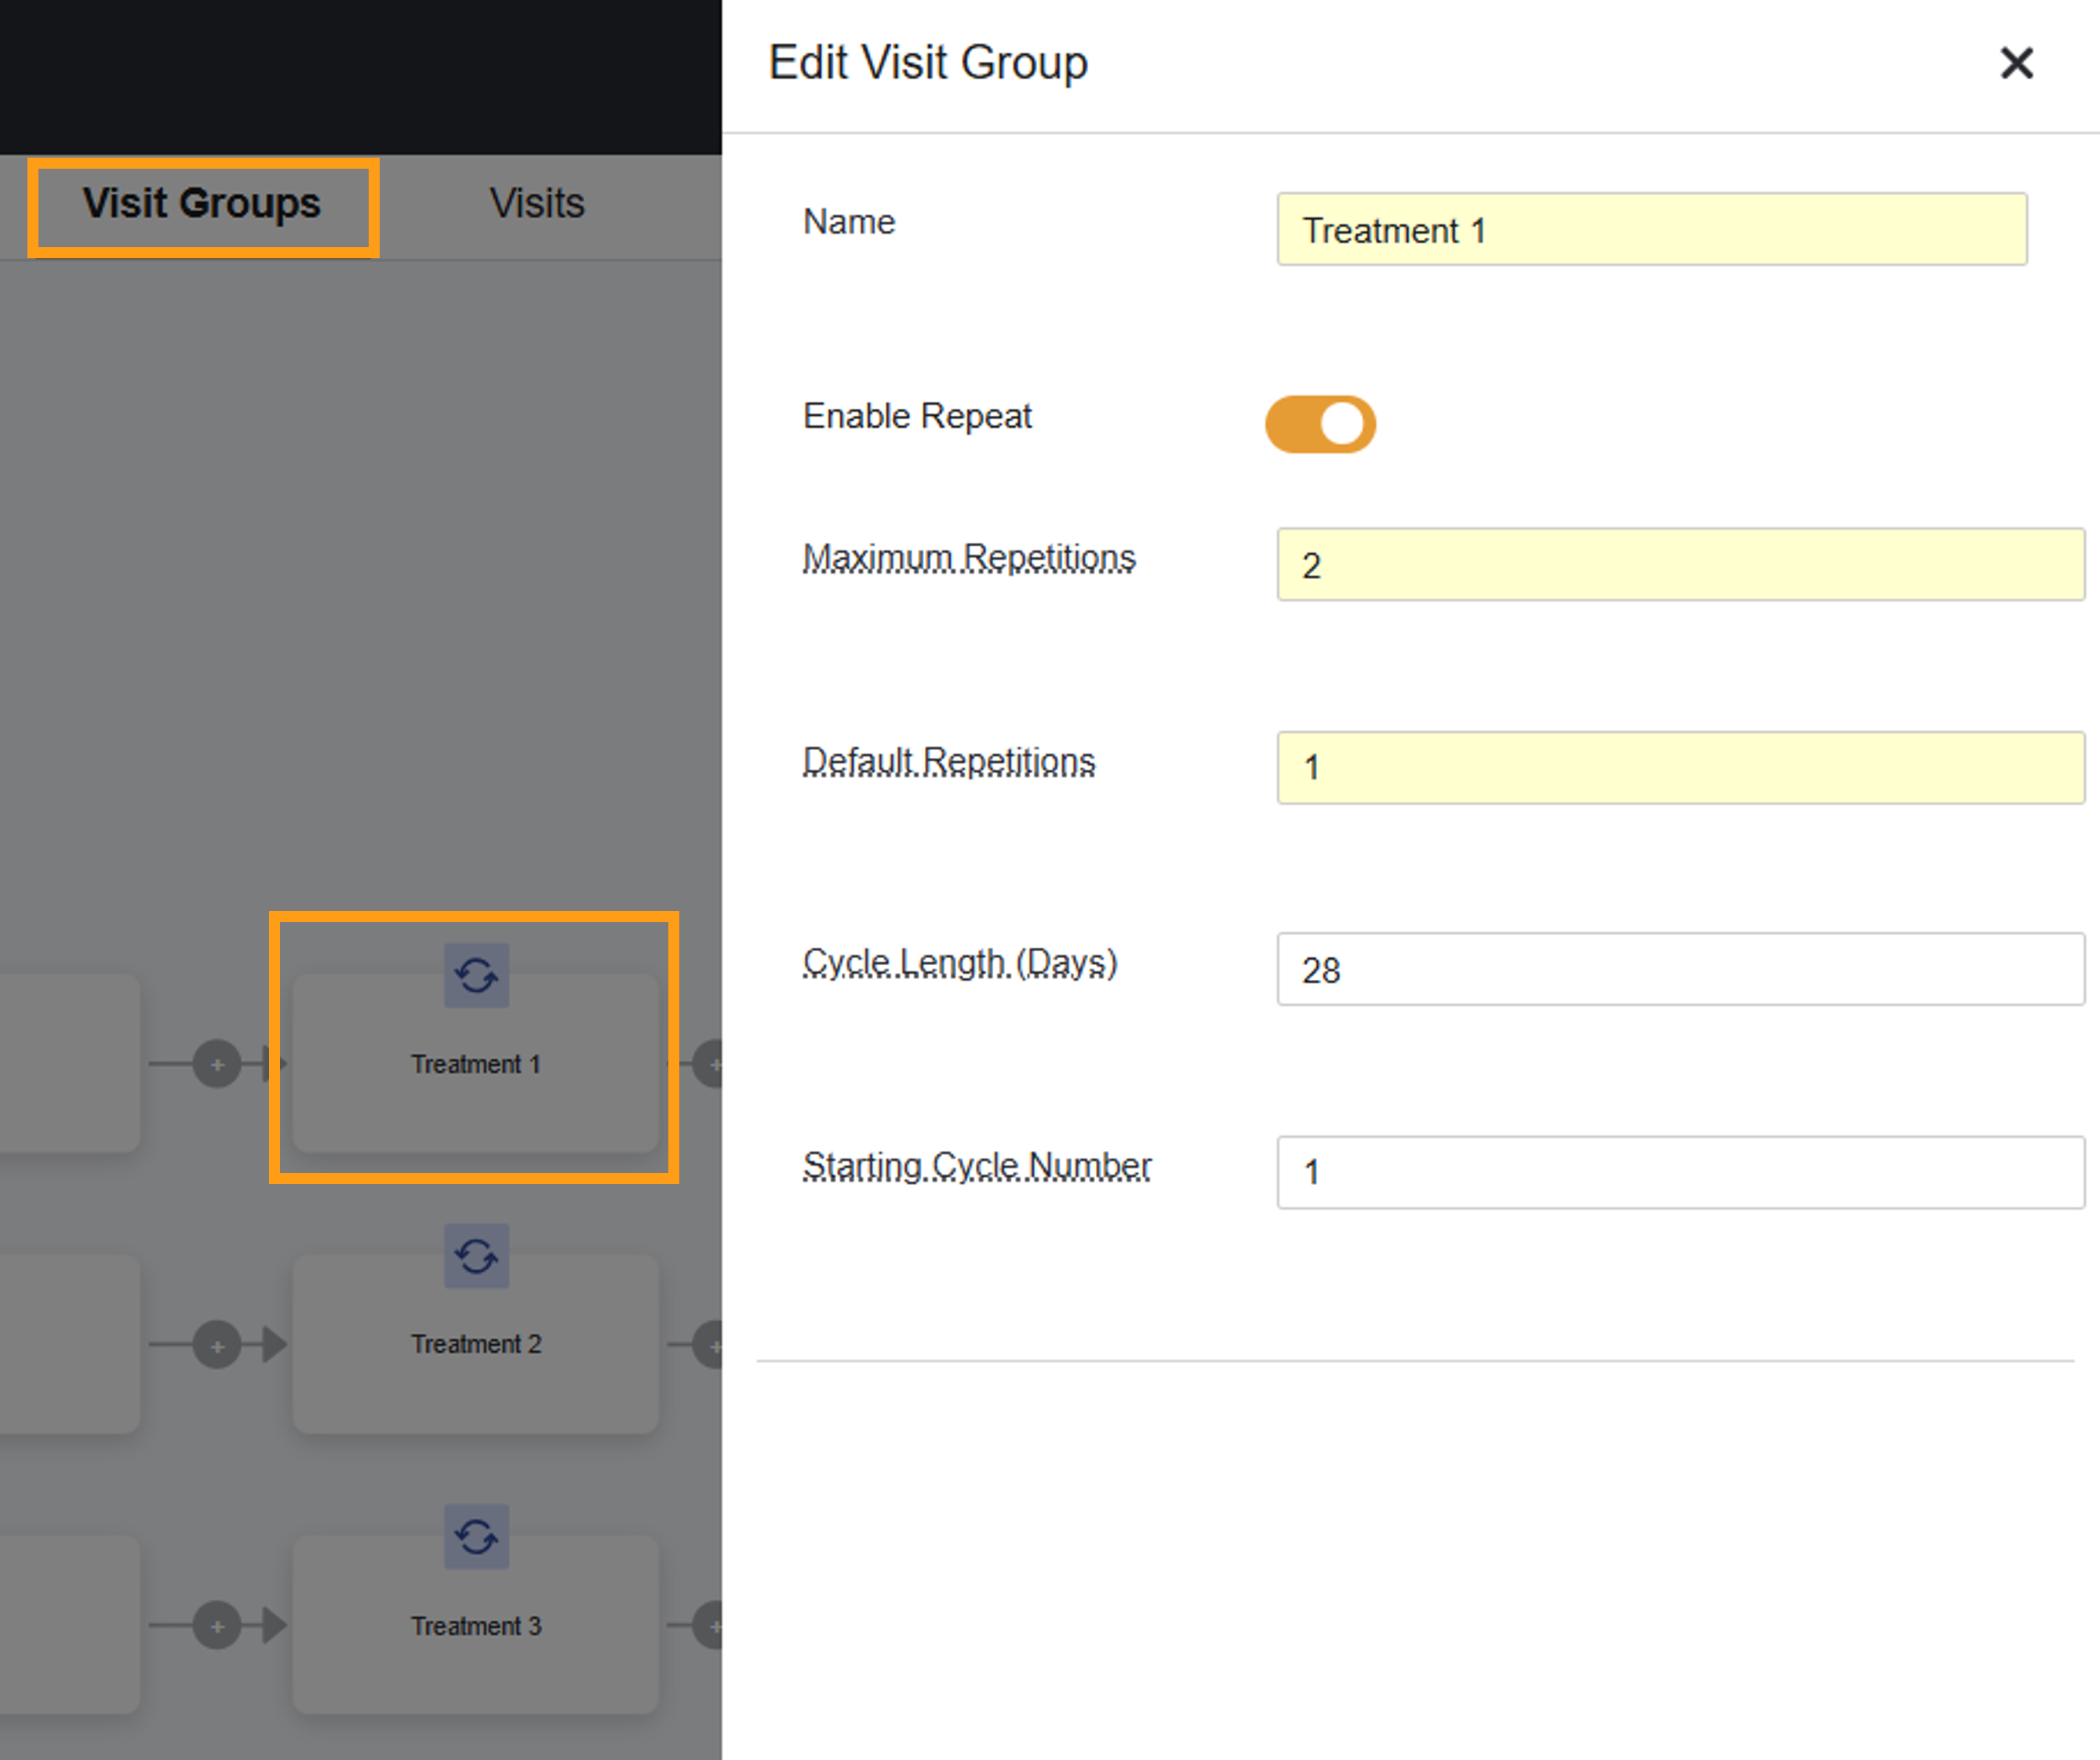
Label Groups/Phases and Determine Repeat Options
If a set of visits within a group/phase repeat exactly as laid out multiple times (ex. three identical cycles of treatment), toggle on the Enable Repeat option for that visit group. This simplifies the schedule building as you’ll only have to create repeatable visits once. The repeat functionality doesn’t account for any variation; ensure you are setting yourself up for success by reviewing all protocol elements that can affect the schedule.
Once repeat is enabled, you can specify the expected and maximum number of repetitions. Optionally, you may also use the Cycle Length field to specify how many days the visit group should take to complete; this number is used to calculate the Target Date for subsequent iterations of the visit group.
Occasionally, a repeating visit group will not represent the first cycle of treatment. In this case,he Starting Cycle Number field allows you to designate a starting number for display to easily identify each iteration in a participant’s schedule. For example, if a group represents cycles 3-9, the starting cycle number is 3 and the visit names will include the appropriate iteration. If no Starting Cycle Number is provided, then the system will assume a starting figure of 1.
When NOT to Use Repeat: If there is any variability in the timing or procedures between cycles, do not use the repeat option. Instead, create separate, distinct visit groups for each varying cycle.
To label schedule elements and determine repeat options, complete the steps below:
- Select a group or visit. This opens a panel to the right.
- Complete the Name field. Consider a naming convention that is helpful to users adding visits/groups to participants.
- Complete the repetition fields.
- Optionally, complete the Cycle Length.
- Optionally, complete the Starting Cycle Number.
- Select Save.