- Administrators and Site Staff with the Study Schedule Design & Management Extended Permission
Study Arms
Adding study arms to your study schedule is optional, but powerful. Adding them requires just a few clicks and provides improved data filtering and reporting, easier participant scheduling and tracking, and smarter budget analysis.
Arms are not the branches themselves; they are a tracking tool assigned to a branch that correspond to the different treatment groups in your study. Assigning study arms to branches doesn’t change the actual schedule; they simply provide an additional way to view, sort, and learn from your data.
Assign and Use Study Arms
Follow the steps below to use study arms.
Step One: Define the Study Arms
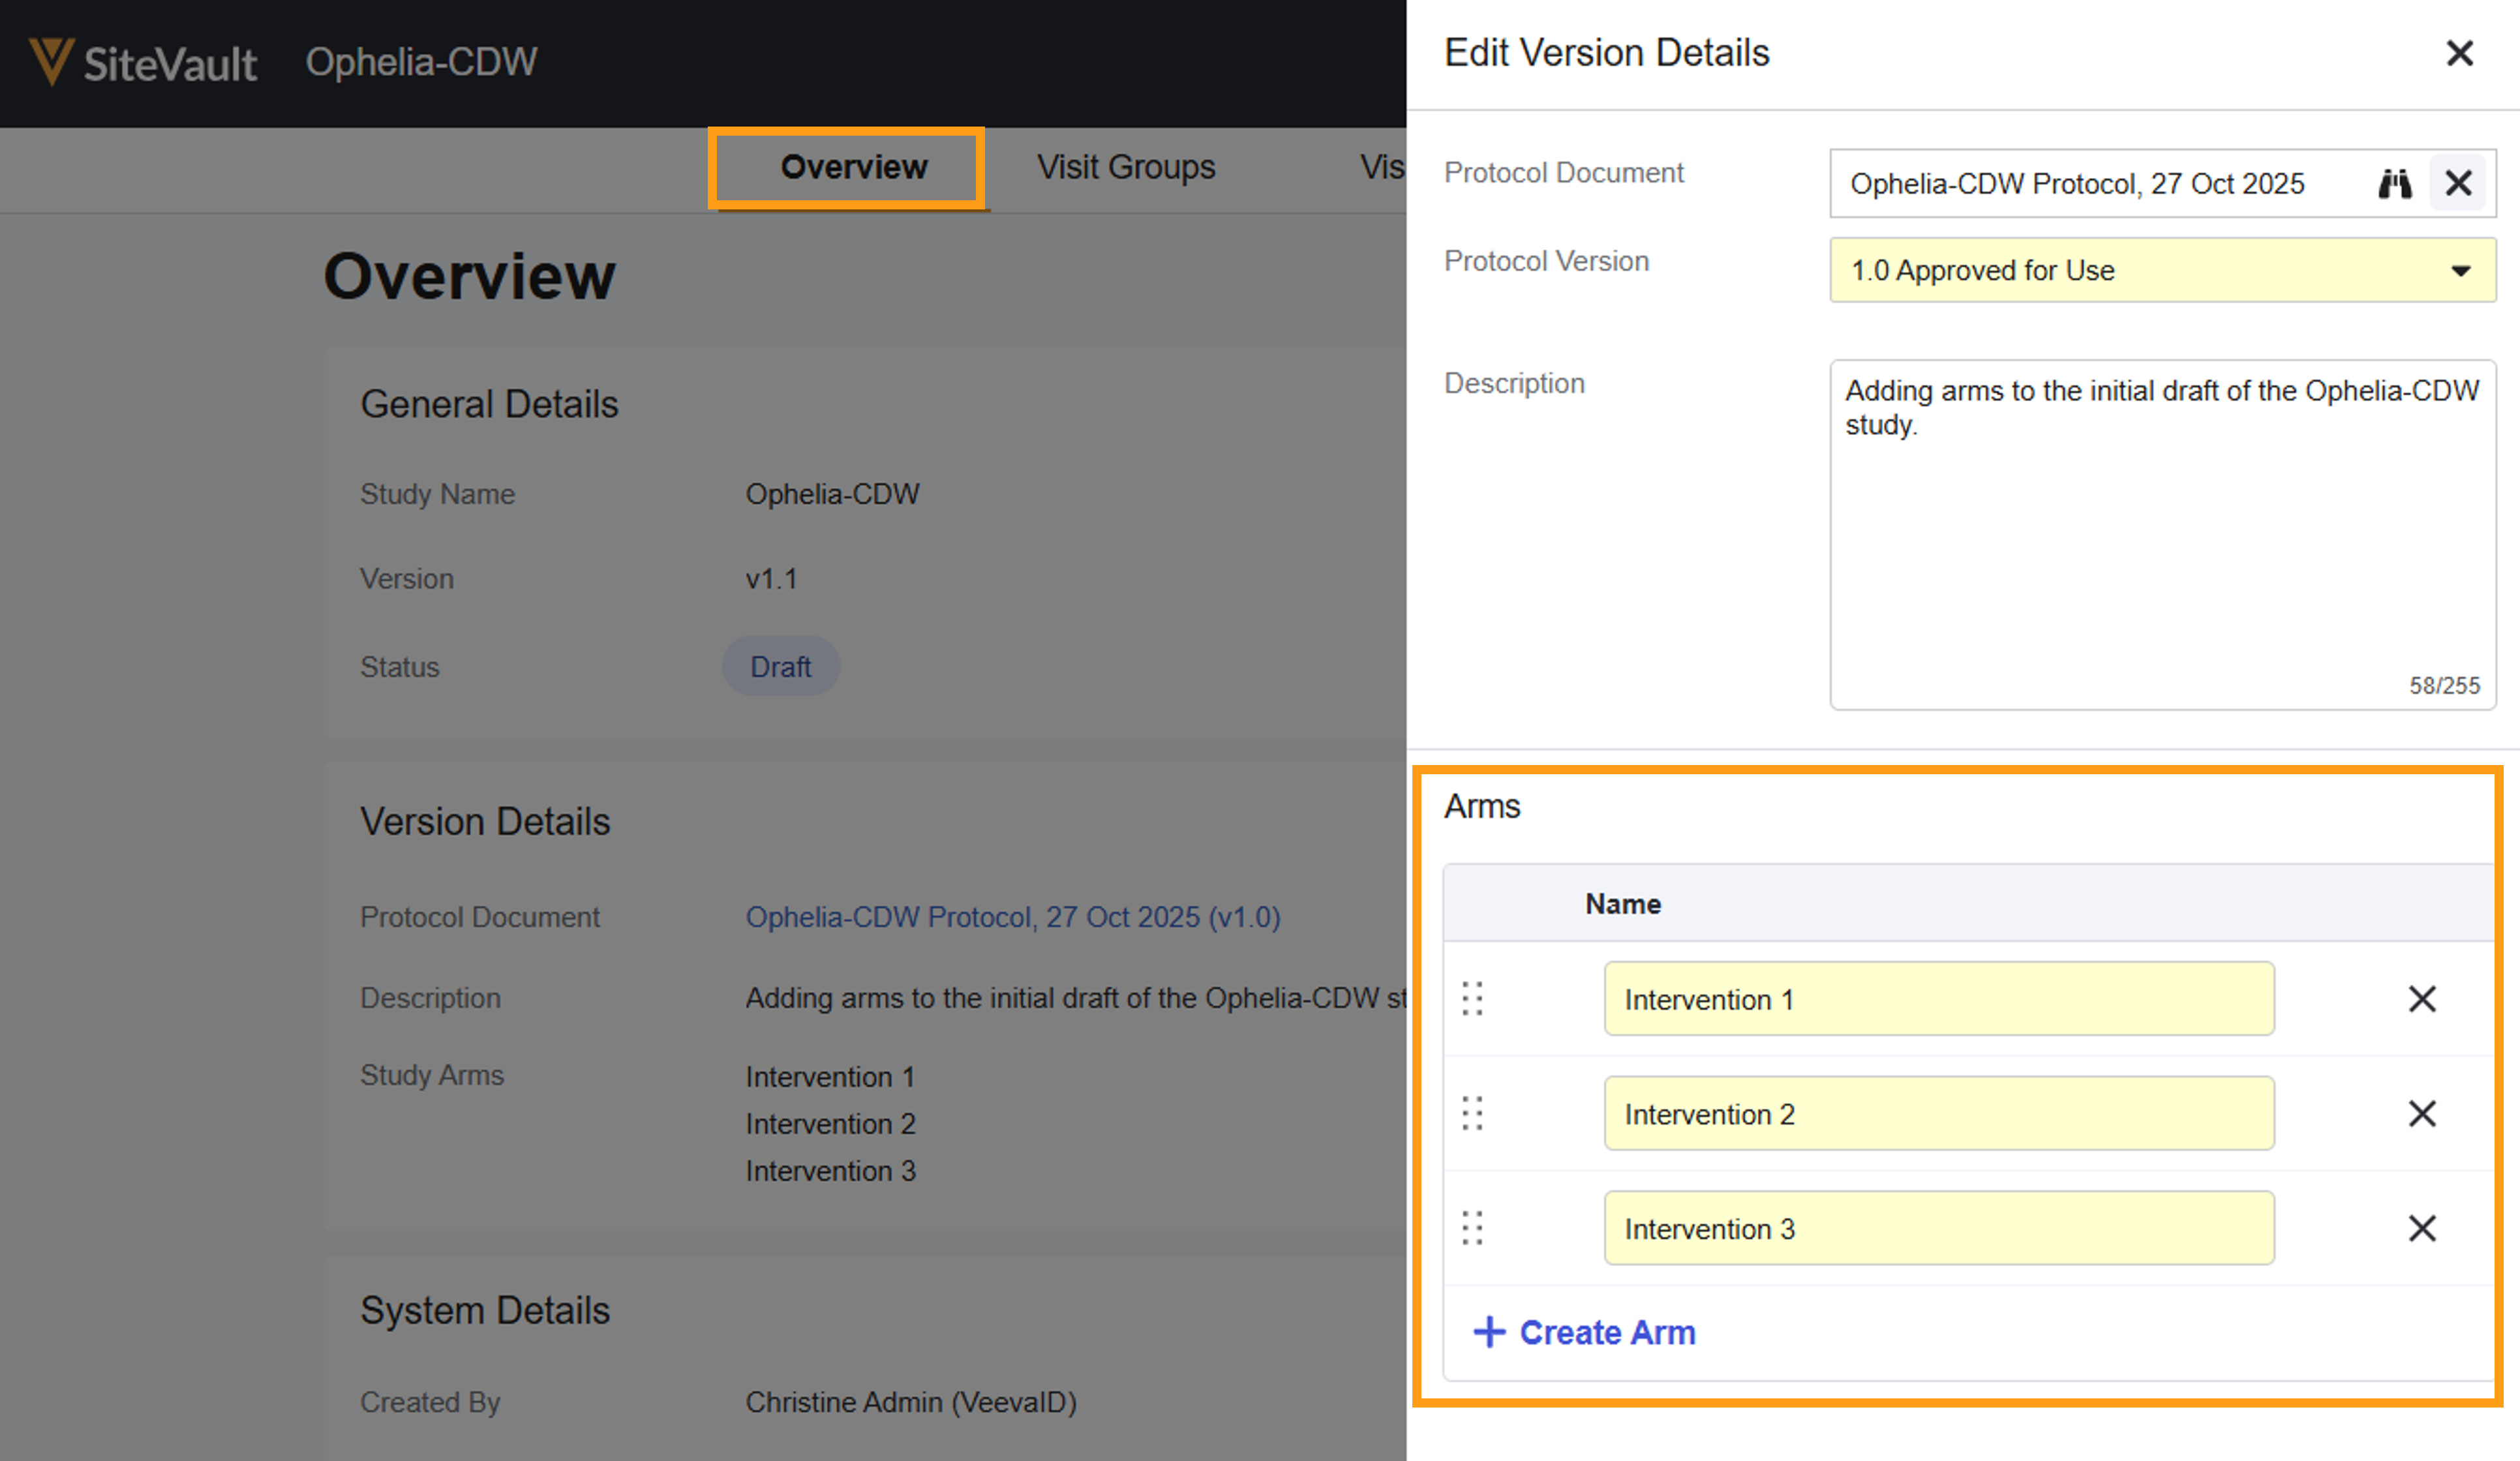
Before you can assign arms, they must be defined in the Study Schedule Overview.
- Navigate to Study Schedule > Overview.
- Select Edit.
- For each study arm:
- Select + Create Arm.
- Enter a name for the arm.
- Select Save.
Step Two: Assign Arms to Branches
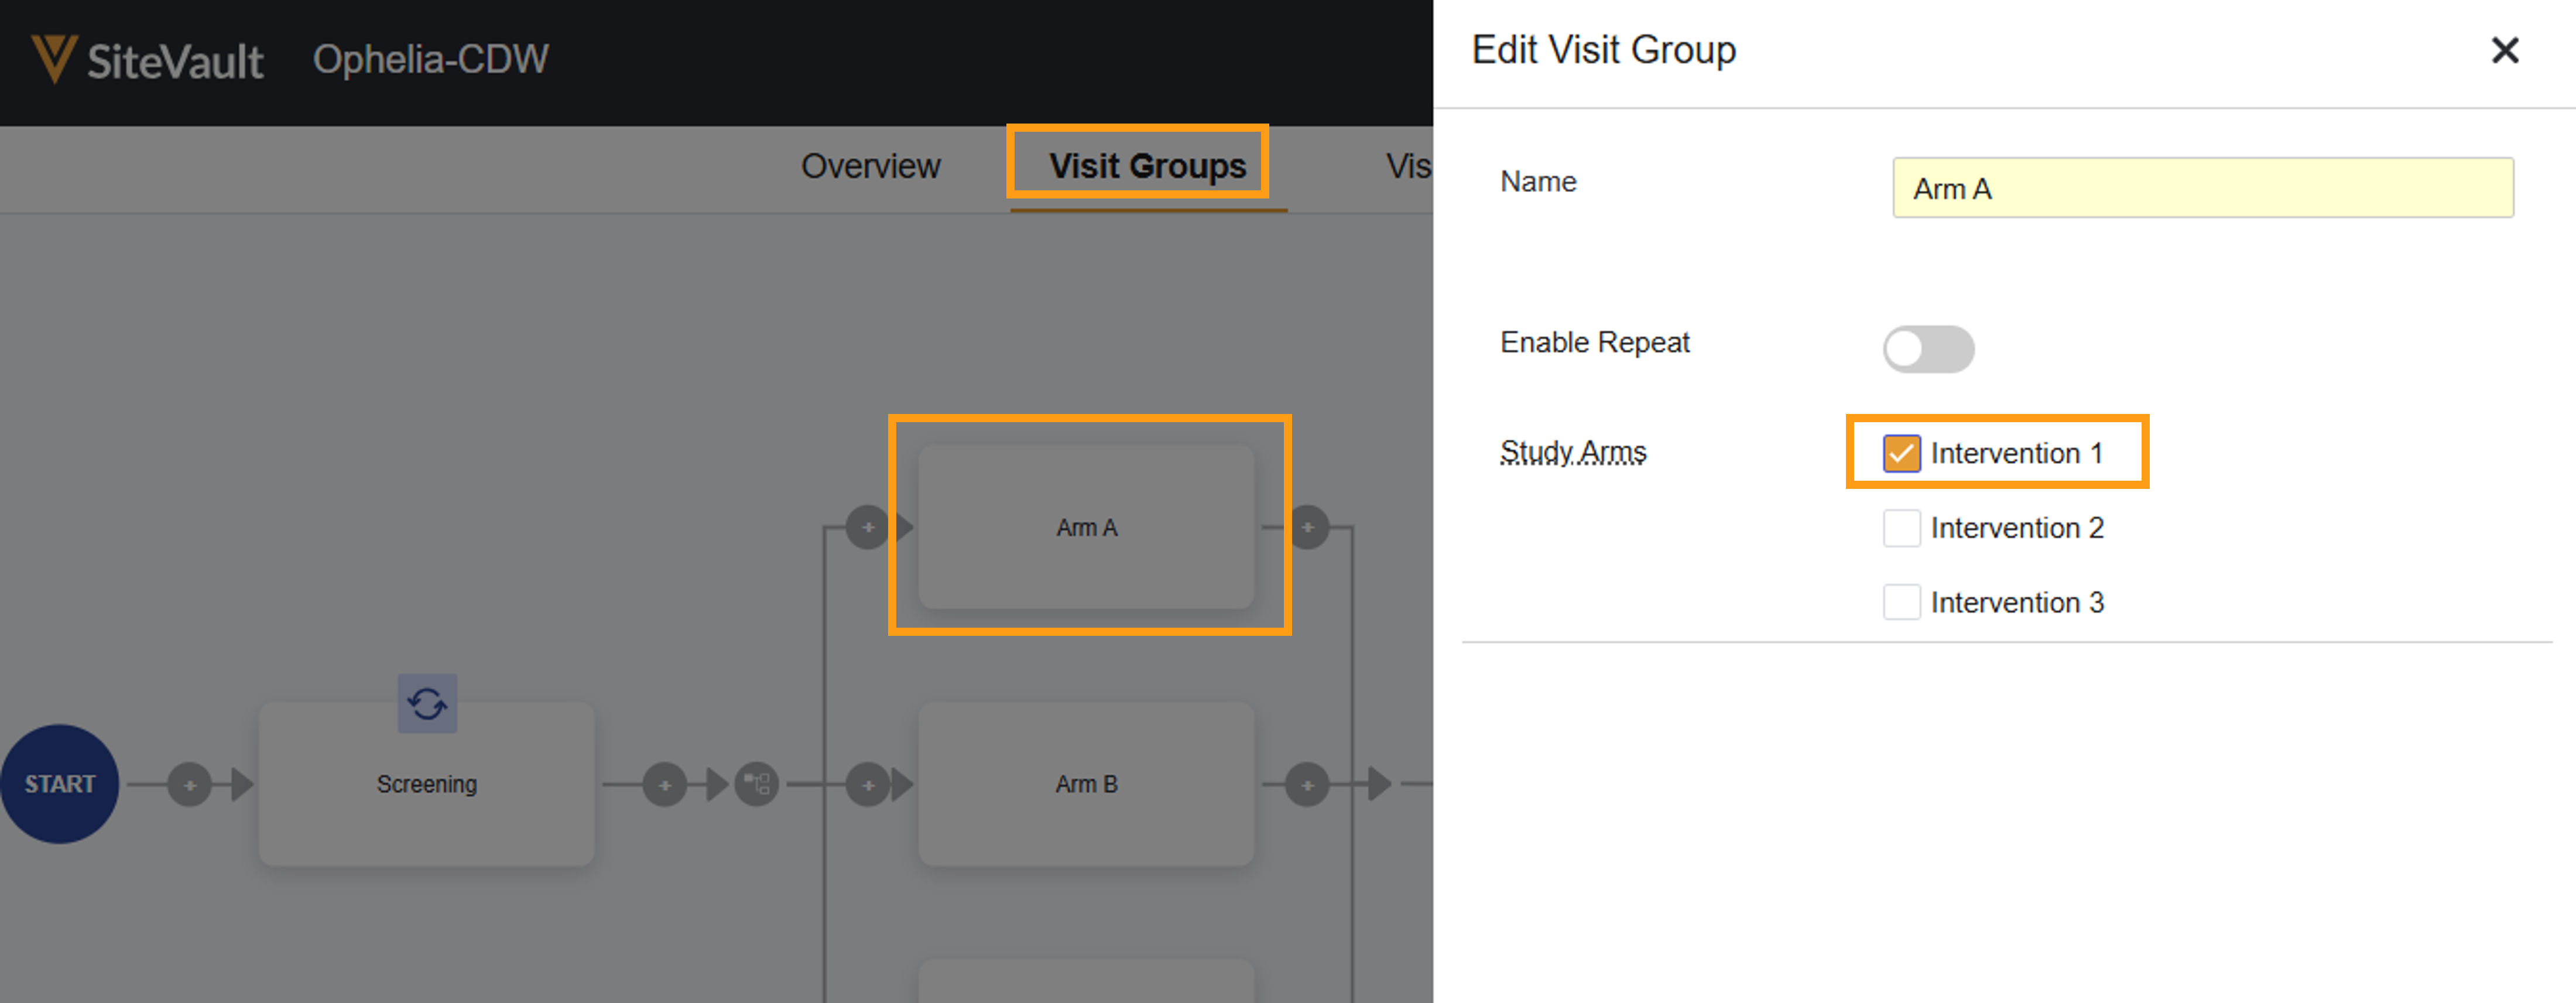
Arm must complete a single, complete path from the start node of a schedule to the end node. Therefore, while a study branch may have one or more arms associated with it, a study arm may not be assigned to more than one branch. Once assigned, arms follow the entire path of the branch.
- Navigate to Study Schedule > Visit Groups.
- For each arm to assign:
- Select a visit group.
- Select the appropriate arm.
- Select Save.
Why can’t I assign arms to all visit groups?
There are a few reasons why the Study Arms field may not be visible in the Edit Visit Group drawer.
- If your schedule is linear (i.e. it does not include branches), then all visits groups are assumed to include all study arms.
- If your schedule includes branches, the Study Arm field will only display on the first visit group for that branch. Subsequent visit groups on the same branch will inherit the same Study Arm selection.
Key Benefits of Assigning Arms
Participant Tracking & Scheduling
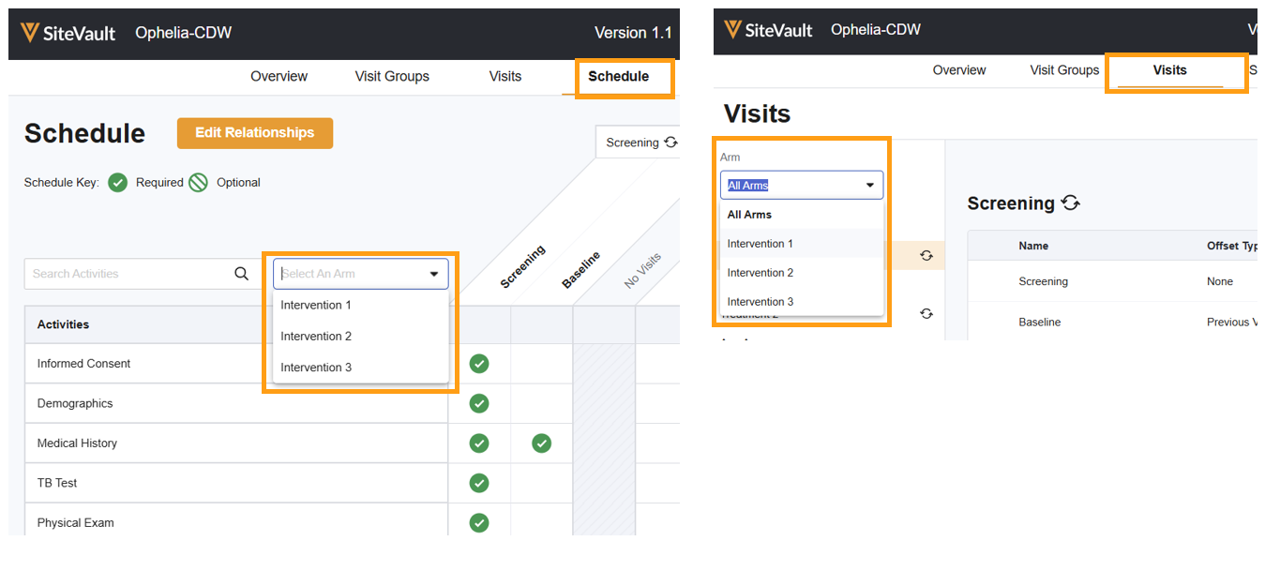
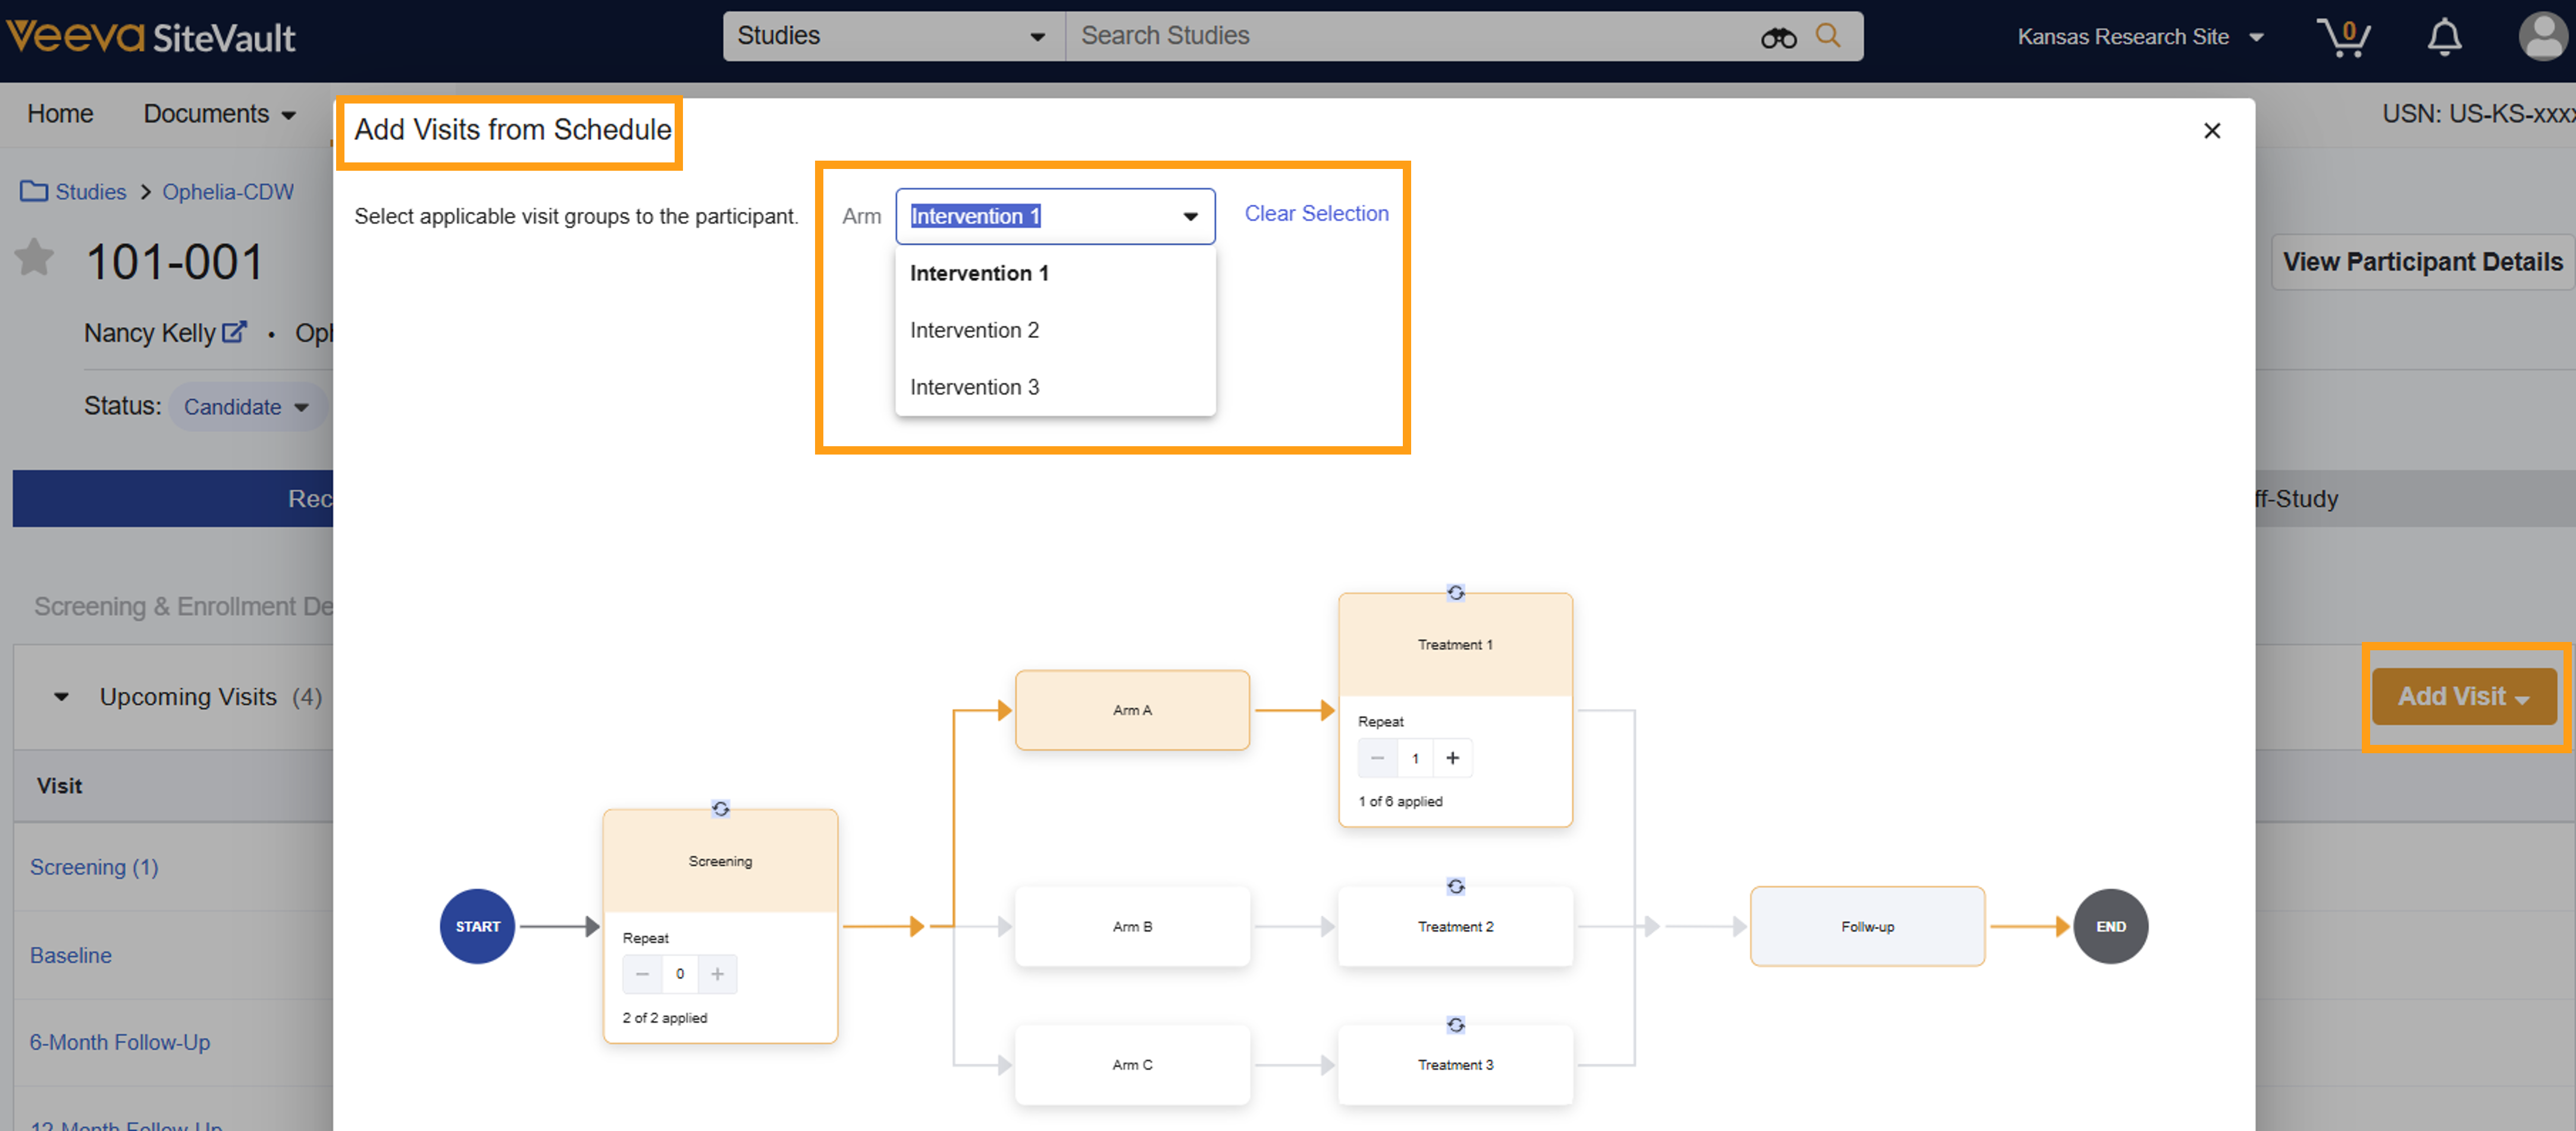
When adding visits for a participant, you can easily filter by Arm to quickly find and add the correct visits/groups for their specific schedule.
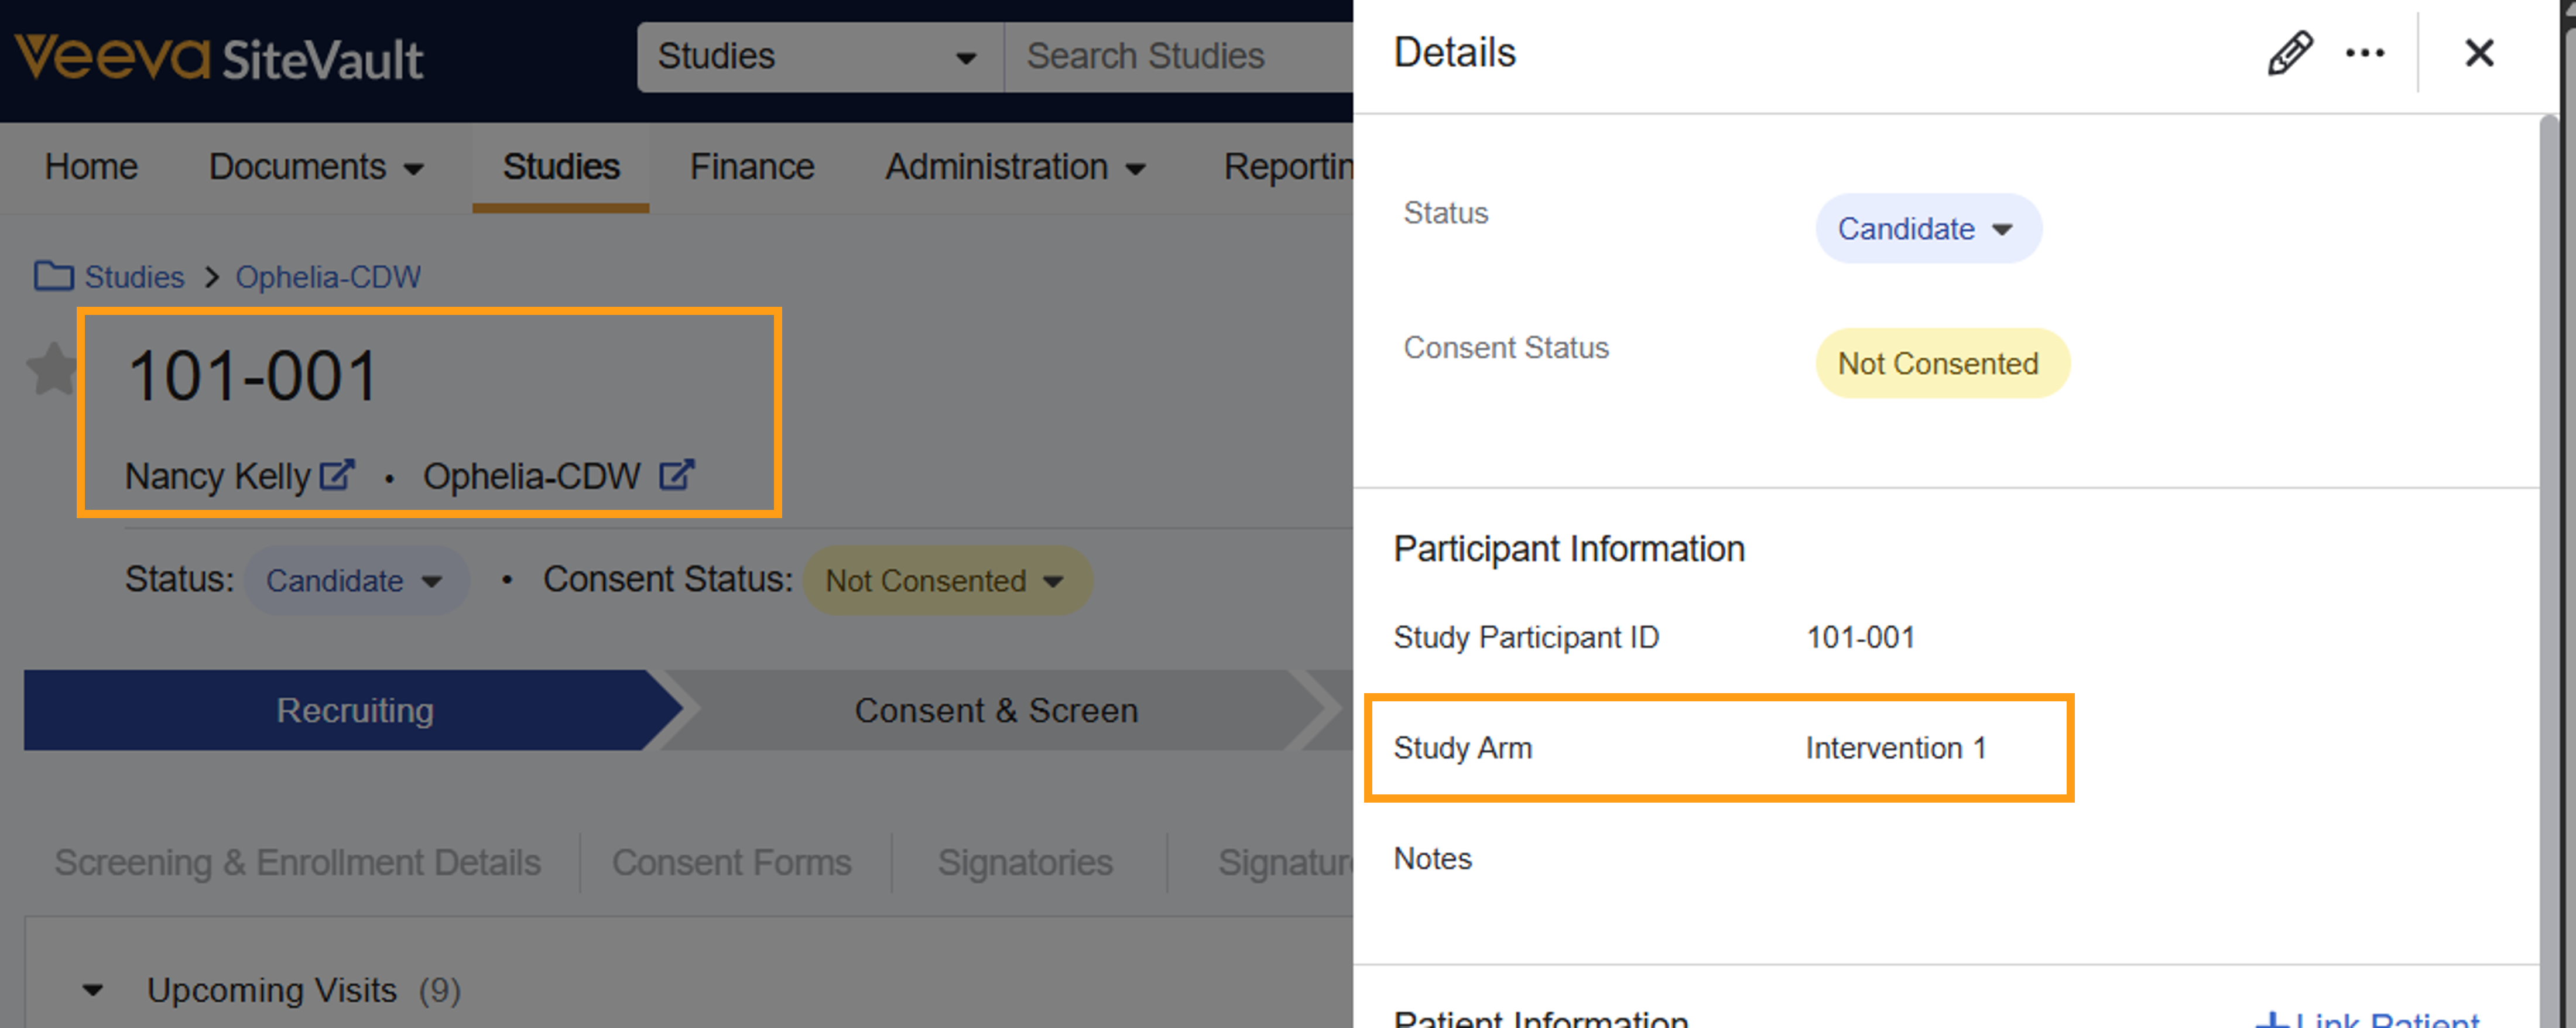
The participant’s assigned arm can be found in Participant Details.
When adding participant visits, you can specify the arm for easier selection.
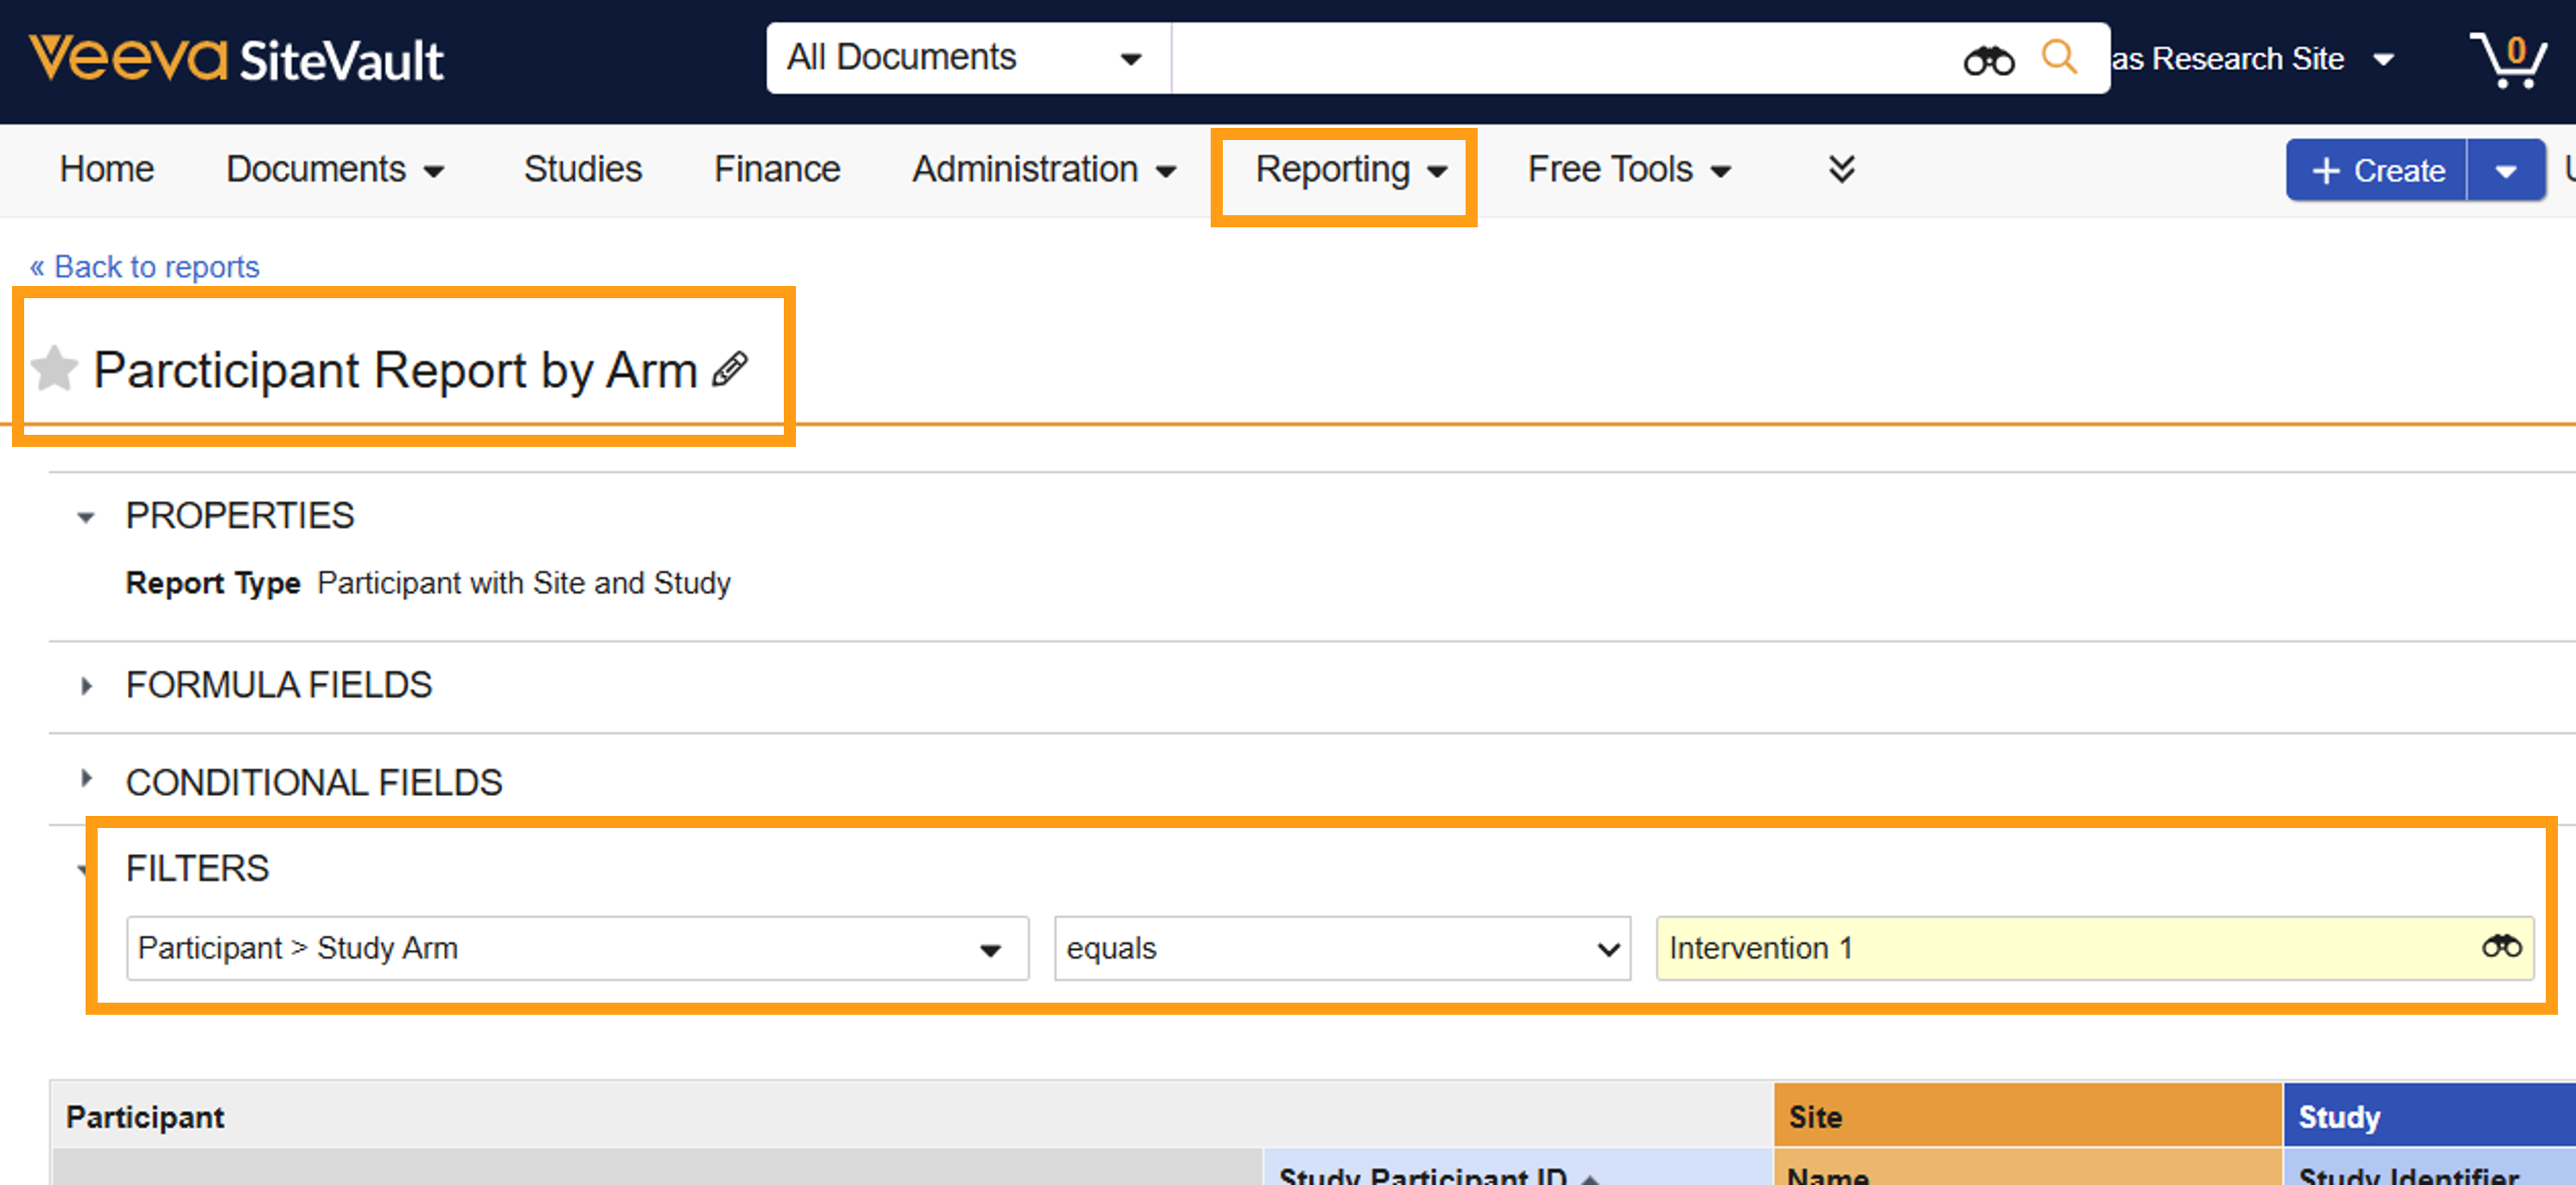
Reporting & Filtering
Arms act as a powerful filter on various tracking and reporting pages, allowing you to run reports and view data specific to a particular study cohort.
Schedule and Budgeting View Filtering
You can filter schedule and budget views, making it easier to visualize and validate the correct path for a specific arm as well as have more control when budget forecasting.